Category: OpenLiteSpeed

News, tutorials, and information about OpenLiteSpeed, the fast open source web server developed by LiteSpeed Technologies. OpenLiteSpeed provides fewer processes, less overhead, more connections, and enormous scalability, with no hardware upgrade required!

  • Platform Showcase: Managed LSWS and OLS with SPanel

    Platform Showcase: Managed LSWS and OLS with SPanel

    Managed LiteSpeed Web Server with SPanel

    Our friends at SPanel asked if they could tell our readers a little bit about their control panel, and about managed LiteSpeed Web Server with SPanel. So, without further ado, here is the SPanel team. -LC

    What is SPanel?

    SPanel is a multifunctional web hosting platform that simplifies server management to a level where anyone can operate their environment even without previous technical experience.

    SPanel developers focus strongly on their fully managed LiteSpeed Web Server and OpenLiteSpeed solutions. They cater to business-oriented site and app owners. You can choose a plan where all technical tasks will be handled by a professional support team.

    The solution consists of two essential parts: The Admin Interface and the User Interface.
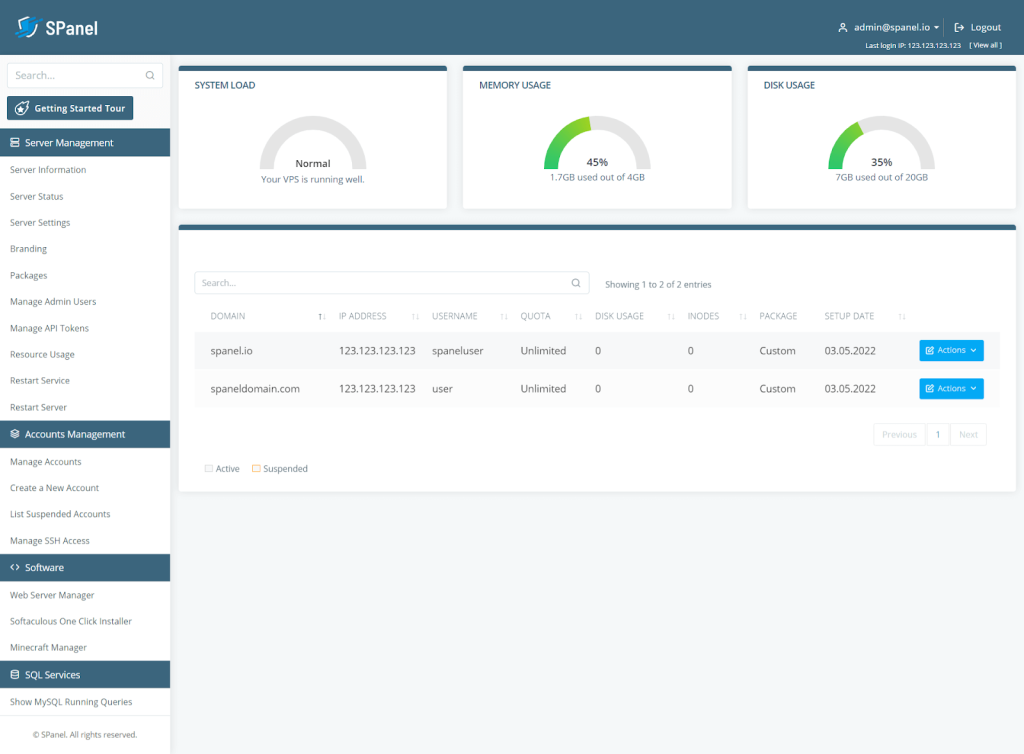
    SPanel LiteSpeed Web Server admin interface

    The Admin Interface is for managing the server and all associated accounts. It allows you to create, modify, and delete accounts, monitor your connectivity and running processes, restart the machine, and more.
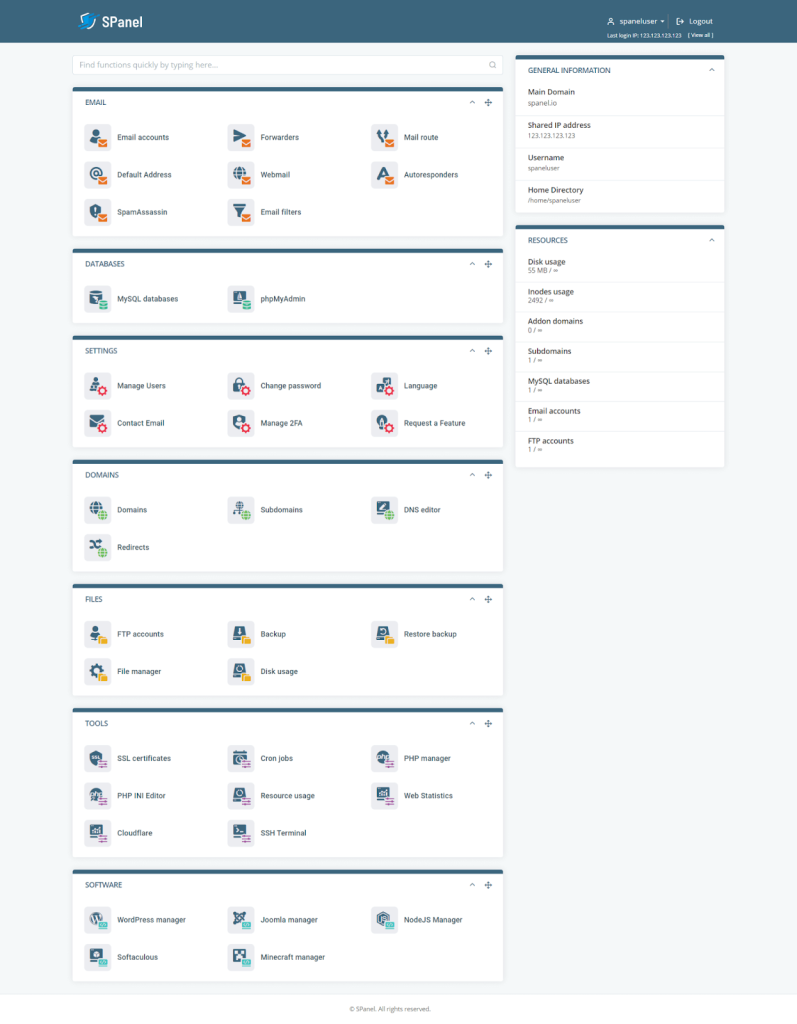
    SPanel LiteSpeed Web Server user interface

    The User Interface is responsible for managing individual accounts and services. It has an intuitive graphic interface that helps you deal with domain names, emails, site files, databases, SSL certificates, and more.

    SPanel integrates with all popular web hosting solutions. Using its powerful API, you can pair the platform with LiteSpeed, OpenLiteSpeed, Nginx, WHMCS, Softaculous – basically the full package of services to start any type of online project.

    For a complete list of features, check out the SPanel.io website or take a look at this introductory video:

    How to Install LiteSpeed Web Server or OpenLiteSpeed in SPanel

    Switching your service to LiteSpeed Web Server or OpenLiteSpeed is effortless in SPanel. The process involves literally just three clicks:

    IMAGE

    1. Log in to your SPanel Admin Area.
    2. Choose the Web Server Manager option under Software in the left-side menu.
    3. Choose LiteSpeed or OpenLiteSpeed on the next screen.
    4. Activate by clicking the blue button at the bottom of the page.

    That is all there is to it – quick and seamless integration that requires no technical expertise.

    SPanel Benefits

    cPanel still holds the lion’s share of the market for web hosting solutions, but alternatives like SPanel, Plesk, and InterWorx are certainly gaining traction

    In fact, there are numerous reasons why SPanel, in particular, has been getting so much attention. Here are a few of the most notable:

    • Fully Managed Service: SPanel might be extremely user-friendly, but many website owners still prefer to focus on their business instead of dealing with technicalities. For them, the developers offer a fully managed service where their support team takes care of all configurations, updates, monitoring, maintenance, and technical issues.
    • SShield: one of the things only SPanel can offer is SShield, an AI-powered security monitoring system. The tool has proven to be a beast when it comes to cybersecurity, recognizing over 99.98% of all known malware and spam. Whenever SShield detects suspicious activities in your web traffic, it proactively sends a notification, so you have enough time to react.
    • SWordPress Manager: another unique SPanel integration, targeted for WordPress users. If you are looking to simplify your day-to-day operations with the most popular CMS, you can install WP, take advantage of automatic updates, change admin password, and many more. The Security Lock feature allows you to restrict editing access to chosen folders and directories, protecting WordPress installation from any outside breaches.
    • Joomla Manager: similar to SWordPress Manager, SPanel packs a solution for all the Joomla fans. The Joomla Manager is integrated by default in SPanel, helping users with a one-click installation, password change, and site cloning.
    • Feature Requests by Users: the thing that most separates SPanel from similar platforms is the involvement of the entire community. The control panel receives regular updates, and most new feature implementations come directly from user suggestions. There is a Feature Requests forum on the official website. You can suggest a new feature or vote on other people’s ideas. The SPanel engineers gather all popular requests and put them on the to-do list, ensuring they see the light of day in future updates.

    Final Takes

    SPanel can be a highly reliable alternative to the market leaders in hosting management solutions. The platform is lightweight, highly secure, and extremely versatile. The managed plans are ideal for website owners who have a strong business focus. They take the weight off of the webmaster’s shoulders. And the licensing model, lets you take full advantage of SPanel with any host.

    Our thanks to SPanel for sharing their story! Does your business provide a tool that enhances the LiteSpeed experience? If you would like to share your story with our readers, find me (@Lisa at Litespeed) on our Slack workspace, and we can discuss it. –LC


  • WordPress Cloud Image FAQ

    WordPress Cloud Image FAQ

    WordPress Cloud Image FAQ

    LiteSpeed cloud images allow you to spin up a high performance web server and applications in three minutes or less! These images are available from several providers, including DigitalOcean, Vultr, Google Cloud Platform, AWS, Azure and Alibaba Cloud, and they come with a variety of web applications, the most popular of which is WordPress.

    So let’s say that you’ve chosen a provider, and installed an OpenLiteSpeed and WordPress cloud image. You’re up and running, but maybe you have questions. Well, you are in the right place, because we have answers! Here are some of the common things that people like you want to know:

    Where are the WordPress files stored?

    After your cloud image installation is complete, the WordPress files can be found in the Document Root, which is set to /var/www/html.

    Can I complete the script later?

    Sure. If you don’t want to finish the setup script right now, you can press CTRL-C to exit the script. The next time you log in from the SSH console, the script will automatically pick up where you left off. You can CTRL-C as often as you need to. The script will prompt you at every future login until you complete the setup.

    How do I secure phpMyAdmin?

    There are three ways to secure phpMyAdmin: Change the URL, allow only specific IP addresses, and require a password. You can use any of these options, and you can use more than one of them, if you like.

    Change your phpMyAdmin URL

    In the WebAdmin Console:

    • Navigate to WebAdmin > Virtual Hosts > Context
    • Change URI from /phpmyadmin to the URI of your choice

    Only allow specific IP addresses

    In the WebAdmin Console:

    • Navigate to WebAdmin > Virtual Hosts > Context > phpmyadmin
    • Change Access Allowed from * to a comma-delimited list of allowed IP addresses and subnets
    • Set Access Denied to *

    Require a password

    Log into the SSH console and create a password file, like so:

    $ sudo touch /usr/local/lsws/conf/PASS
    $ sudo chown lsadm:lsadm /usr/local/lsws/conf/PASS
    

    In the WebAdmin Console:

    • Navigate to WebAdmin > Virtual Hosts > Security
    • Click + under Realm List then set Realm Name to example
    • Set User DB Location to /usr/local/lsws/conf/PASS
    • Click /usr/local/lsws/conf/PASS to create a user and password
    • Navigate to WebAdmin > Virtual Hosts > Context > phpmyadmin
    • Set Realm to example

    How do I create additional virtual hosts?

    OpenLiteSpeed comes with a single virtual host named example. There are two ways to create additional virtual hosts: with a script, and manually.

    With a script

    This method will automatically set up Listener, VirtualHost, Force SSL, Let’s Encrypt, and WordPress. You can run the script either in Interactive Mode, or from the CLI.

    Interactive Mode

    Use the following commands to download and run the script:

    wget https://raw.githubusercontent.com/litespeedtech/ls-cloud-image/master/Setup/vhsetup.sh
    chmod +x vhsetup.sh
    bash vhsetup.sh
    

    Or just run the script without downloading it:

    /bin/bash <( curl -sk https://raw.githubusercontent.com/litespeedtech/ls-cloud-image/master/Setup/vhsetup.sh )
    

    CLI Mode

    Use the following commands to download and run the script:

    wget https://raw.githubusercontent.com/litespeedtech/ls-cloud-image/master/Setup/vhsetup.sh
    chmod +x vhsetup.sh
    bash vhsetup.sh -d www.example.com -le admin@example.com -f -w
    

    Or just run the script without downloading it:

    /bin/bash <( curl -sk https://raw.githubusercontent.com/litespeedtech/ls-cloud-image/master/Setup/vhsetup.sh ) -d www.example.com -le admin@example.com -f -w
    

    Some tips:

    • In the example, we use -le admin@example.com. When you do this, be sure that your domain is already pointing to the server, and to substitute your own email address.
    • We also use -w. This requires that your environment has PHP, SQL service, and SQL root password.

    Manually

    Our OpenLiteSpeed knowledge base has full instructions for creating new virtual hosts manually. See Create Virtual Hosts on OpenLiteSpeed.

    Can I use LiteSpeed Enterprise with the Cloud Image?

    Sure. You can upgrade from OpenLiteSpeed to LiteSpeed Enterprise at any time. We have a script that will take care of this for you, though we do suggest that you try the script on a test server first. Also, you can get help by using the -H parameter when you run the script.

    Use this command:

    /bin/bash <( curl -sk https://raw.githubusercontent.com/litespeedtech/ls-cloud-image/master/Setup/ols2ent-v2.sh )
    

    The script will:

    1. Generate a LiteSpeed Enterprise configuration file from your OpenLiteSpeed config file
    2. Ask you for a valid license key (enter the word Trial if you would like to start with a 15-day trial license)
    3. Back up the OpenLiteSpeed config file and uninstall OpenLiteSpeed
    4. Install LiteSpeed Enterprise and load the config file

    Conclusion

    We hope we’ve answered all of your burning questions, but if there’s anything else you want to know, take a look at our comprehensive documentation. Or drop by our Slack community (first timers, click here for an invitation) and ask your question in the #openlitespeed or #wpcache channel!

    Thanks to Eric Leu for his contributions to this post.

  • OpenLiteSpeed or LiteSpeed Enterprise?

    OpenLiteSpeed or LiteSpeed Enterprise?

    OpenLiteSpeed or LiteSpeed Enterprise

    Are you an OpenLiteSpeed user wondering if you should take the next step and upgrade to LiteSpeed Enterprise Web Server? Or maybe you’re new to LiteSpeed entirely, and not sure which server product is right for you. Either way, we can help.

    The open source OpenLiteSpeed (or OLS), and the Enterprise-level LiteSpeed Web Server (or LSWS) have many features in common: both are equipped with the powerful LSCache engine, cutting edge HTTP/3 support, unlimited IP-based and name-based virtual hosting, compression with GZIP and Brotli, and so much more.

    To help in your decision-making, let’s look at some of the main differences between OLS and LSWS.

    Main Differences

    .htaccess

    .htaccess files are configuration files used by Apache web server to define rules for the server’s behavior on a per directory basis. OLS and LSWS differ in the extent to which they each support .htaccess.

    • LSWS supports Apache rewrite rules and the majority of Apache directives. It will automatically detect any changes to .htaccess files, and will adjust as necessary without any need for a server restart.
    • OLS supports Apache rewrite rules, but does not support Apache directives. You will need to restart the server to load any changes to .htaccess.

    ModSecurity Engine

    ModSecurity is an open-source web application firewall, which provides server protection by filtering web traffic through a series of rules. Both OLS and LSWS support ModSecurity rules, but there are differences.

    • LSWS boasts a proprietary ModSecurity engine that was built by the LiteSpeed team to deliver superior performance. It processes Apache ModSecurity rules using a highly optimized asynchronous approach.
    • OLS also supports Apache ModSecurity rules through a standard ModSecurity v3 engine, using the same library as open source nginx uses.

    ESI

    ESI, which stands for Edge Side Includes, is a markup language that allows web developers to designate parts of a web page as fragments that the server will process separately from the rest of the page. With ESI, a web page can be broken into different fragments, processed separately, and then re-assembled before being delivered to the browser. It is especially useful in ecommerce applications where there may be a mix of public and private information on a single page. When combined with LSCache, ESI creates a powerful cache solution.

    • LSWS supports ESI.
    • OLS does not support ESI.

    Asynchronous SSL Handshake

    The private key handshake of SSL can put a strain on server resources. Asynchronous SSL handshake relieves that strain by moving handshake operations to separate worker threads instead of handling it in the main event-handling thread. This improves SSL performance and reduces congestion in I/O event handling.

    • LSWS supports Asynchronous SSL Handshake
    • OLS does not support Asynchronous SSL Handshake

    WordPress Brute Force Protection

    During a WordPress Brute Force Attack, attackers repeatedly access the login page in an attempt to guess a valid user ID and password, and gain entry to the system. Besides the obvious security risks that brute force attacks pose, they also consume considerable server resources.

    • LSWS comes with built-in protection against WordPress Brute Force Attack.
    • OLS does not have native protection against WordPress Brute Force Attack

    Control Panel Support

    Web hosting control panels are a popular way for system administrators to handle server management tasks. Many popular control panels were written specifically for Apache servers.

    • LSWS is a drop-in Apache replacement, which means that any control panel that supports Apache also supports LSWS. Popular LSWS-friendly control panels include cPanel, Plesk, DirectAdmin, and more.
    • OLS is not a direct replacement for Apache, so it cannot automatically use the same control panels as Apache. However, there is a growing number of control panels that support OpenLiteSpeed, including CyberPanel, DirectAdmin, CloudPages, RunCloud, and GridPane. Additionally, pre-built OpenLiteSpeed cloud images are available on every major platform for simple installation.

    Licensing

    Licensing requirements are also different between the two servers.

    • LSWS requires a license. There’s a LiteSpeed license to fit any situation, from the Free Starter license for single domains on small servers, to the unlimited license for large web hosts, and everything in between.
    • OLS is 100% free and open source. It may be used by anyone with any number of domains, and any size server, under a GPLv3 License.

    Learn More

    OpenLiteSpeed or LiteSpeed Enterprise: which should you choose?

    OpenLiteSpeed and LiteSpeed Enterprise Web Server are both feature rich, and this comparison is just the beginning. We’ve only covered the big differences here. You can explore the full list of features of both servers side by side on our LiteSpeed Web Server Editions page if you’d like to continue your research.

    Already know what you want? Choose your own adventure: get OpenLiteSpeed or get LiteSpeed Enterprise today!

  • Full Disclosure of CVE-2022-0072, CVE-2022-0073, and CVE-2022-0074 and What You Should Do

    Full Disclosure of CVE-2022-0072, CVE-2022-0073, and CVE-2022-0074 and What You Should Do

    CVE-2022-0072 CVE-2022-0073 CVE-2022-0074

    Security has always been at the forefront of our development process at LiteSpeed Technologies. So when a vulnerability is discovered, we act quickly. Our priority is to empower our customers to better protect their systems, but we also take such situations as learning opportunities.

    Today, as a part of that commitment, we want to share details of certain bugs reported in OpenLiteSpeed (OLS) and LiteSpeed Enterprise (LSWS) web servers.

    Summary

    • Three vulnerabilities were reported to LiteSpeed. These were fixed in OpenLiteSpeed v1.7.16 Build 1 and LiteSpeed Enterprise v6.0.12 Build 10.
    • These vulnerabilities don’t impact the majority of our clients. One is within the Docker system, and the other two cannot be exploited without WebAdmin access.
    • You should upgrade to the latest version and build of OpenLiteSpeed or LiteSpeed Enterprise, as appropriate.
    • Future security updates will be released with incremented version numbers, and will no longer be released as new builds of existing version numbers.

    About the Vulnerabilities

    We would like to thank the Unit 42 Team at Palo Alto Networks for responsibly disclosing security issues in our OpenLiteSpeed and LiteSpeed Enterprise web servers on October 4th, and maintaining good communication throughout.

    LiteSpeed’s Team acted swiftly and informed Unit 42 that the issues were under remediation.

    On October 8th, we internally remediated these bugs and put them into testing. During this period we monitored the changes and ensured they were not affecting anything else.

    On October 12th, we pushed the related updates to LiteSpeed Enterprise v6.0.12 as Build 10

    On October 18th, we pushed the related updates to OpenLiteSpeed v1.7.16 as Build 1

    On October 20th, our Docker Images for both OLS and LSWS were updated.

    The reported vulnerabilities have the following CVE numbers: CVE-2022-0072CVE-2022-0073 and CVE-2022-0074.

    Palo Alto Networks has already released information about these CVEs, but we would like to expand on this, below.

    CVE-2022-0072

    Directory Traversal (CVE-2022-0072) rated Medium severity (CVSS 5.8)

    [This issue] was a directory traversal vulnerability that could allow an attacker to bypass security measures and access forbidden files. An attacker that compromised the server could create a secret backdoor and exploit the vulnerability to access it.

    This vulnerability applies to OpenLiteSpeed and LiteSpeed Enterprise WebAdmin Console, and is only exploitable after WebAdmin Authentication has been achieved.

    Additionally, you must have root privileges in order to upload a custom exploit under /usr/local/lsws/admin/html.

    CVE-2022-0073

    Remote Code Execution (CVE-2022-0073) rated High severity (CVSS 8.8)

    At the first stage of the attack, we tried to gain remote code execution and found that the OpenLiteSpeed Web Server admin dashboard is vulnerable to a command injection vulnerability. A threat actor who managed to gain the credentials to the dashboard, whether by brute force attacks or social engineering, could exploit the vulnerability in order to execute code on the server.

    This also applies only to the OLS and LSWS WebAdmin Console for an authenticated user.

    CVE-2022-0074

    Privilege Escalation (CVE-2022-0074) rated High severity (CVSS 8.8)

    While exploring the OpenLiteSpeed Docker image as nobody, we found a misconfiguration in the PATH environment variable that could be exploited into a privilege escalation using the CWE untrusted search path.

    This is another vulnerability that requires OpenLiteSpeed WebAdmin access in order to exploit. LiteSpeed Enterprise is not affected.

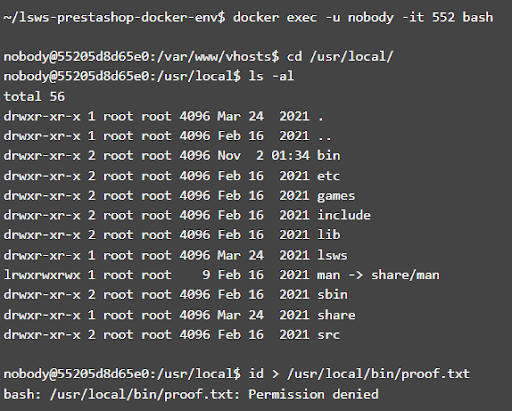
    We were unable to reproduce this scenario in our tests with a standard real-world Docker installation. It seems that the environment used by the reporting team differs from the default Docker configuration. The reporting team’s /usr/local/bin folder was owned by the nobody user, which allowed the vulnerability to operate.

    We tried to reproduce this bug on an Ubuntu 22 system with the default Docker host environment and the vulnerable build of our Docker image. We found that the /usr/local/bin directory was owned by root, and any attempt to change the files in the reported directory failed.

    CVE-2022-0074 Screenshot

    We don’t expect this vulnerability to impact standard Docker installations, however, we are in touch with the PaloAlto Networks Team to get more details on their Docker environment. We’d like to understand how it was customized to make this vulnerability possible.

    Regardless, this is not a privilege escalation from within any LiteSpeed products.

    What You Should Do

    For Docker users, if you’re able to change the contents of /usr/local/bin in your environment, please update to our latest Docker image. An additional security layer which corrects the environment path will be added to your image, effectively patching any side-effects of this vulnerability.

    We also recommend any manual web server installations to be updated by using the $LSWS_PATH/admin/misc/lsup.sh script. Installations installed via any RPM/package managers(yum/apt) will be updated automatically.

    We always recommend, for your general security, that you do not share LiteSpeed WebAdmin authentication details with more than the necessary system administrators. We also suggest you set a strong password and take advantage of the available Brute Force protection available for WebAdmin.

    For best-case scenarios, use a firewall to mask LiteSpeed WebAdmin Console from any public access.

    We would like to once again thank the Unit 42 Team, for their help in making our products secure.

  • OpenLiteSpeed + Go + Gin

    OpenLiteSpeed + Go + Gin

    OpenLiteSpeed + Go + Gin

    In this blog we will talk about how to deploy Gin – a web framework written in Go – by using OpenLiteSpeed on Ubuntu 22.04.

    By using OpenLiteSpeed Web Server as a reverse proxy, we can easily serve multiple apps in the backend via the same port. Rewrite is supported in the .htaccess file in case we need to redirect. Also, once we set up SSL, the HTTP/3 protocol will be ready instantly. In this blog, we use Gin as an example because it allows us to build web applications and microservices in Go. It contains a set of commonly used functionalities, like routing, and the performance is pretty good.

    We will walk though the following processes on our server:

    Installing Go

    Install Go using snap on Ubuntu:

    $ snap install go --classic
    

    Console output:

    go 1.18.5 from Michael Hudson-Doyle (mwhudson) installed
    

    Enable the Go Modules feature, which will allow us to use modules regardless of whether they are in the GOPATH default:

    $ go env -w GO111MODULE=on
    

    Verify the settings with the following command:

    $ go env
    

    Console output:

    GO111MODULE="on"
    GOARCH="amd64"
    ...
    

    Setting up the Gin package

    Create an example project directory named gin-project and access the directory:

    $ mkdir -p /var/www/html/gin-project
    $ cd /var/www/html/gin-project
    

    Create a go.mod file to track our code’s dependencies. Run the command from within the project directory:

    $ go mod init gin-project
    

    Check the content of the go.mod file:

    $ cat go.mod
    

    Console output:

    module gin-project
    
    go 1.18
    

    To get the gin-gonic/gin package from GitHub, we will need to add the following content to the file:

    module gin-project
    
    go 1.18
    
    require github.com/gin-gonic/gin v1.8.1
    

    (Note we are using v1.8.1 in this example. Check for other versions here).

    Run the following command, and the required package will be installed under the GOPATH/pkg/mod directory. A go.sum file will be generated. It’s a record file for the package and version:

    $ go mod download
    

    Now, we are going to download the gin package:

    $ go get github.com/gin-gonic/gin
    

    Console Output:

    go: downloading github.com/gin-contrib/sse v0.1.0
    go: downloading github.com/mattn/go-isatty v0.0.14
    go: downloading golang.org/x/net v0.0.0-20210226172049-e18ecbb05110
    go: downloading github.com/go-playground/validator/v10 v10.10.0
    go: downloading github.com/pelletier/go-toml/v2 v2.0.1
    go: downloading github.com/ugorji/go/codec v1.2.7
    go: downloading google.golang.org/protobuf v1.28.0
    go: downloading gopkg.in/yaml.v2 v2.4.0
    go: downloading github.com/goccy/go-json v0.9.7
    go: downloading github.com/json-iterator/go v1.1.12
    go: downloading golang.org/x/sys v0.0.0-20210806184541-e5e7981a1069
    go: downloading github.com/go-playground/universal-translator v0.18.0
    go: downloading github.com/leodido/go-urn v1.2.1
    go: downloading golang.org/x/crypto v0.0.0-20210711020723-a769d52b0f97
    go: downloading golang.org/x/text v0.3.6
    go: downloading github.com/modern-go/concurrent v0.0.0-20180228061459-e0a39a4cb421
    go: downloading github.com/modern-go/reflect2 v1.0.2
    go: downloading github.com/go-playground/locales v0.14.0


    Using any text editor, create a file named main.go, and add the following example contents:

    package main
    
    import "github.com/gin-gonic/gin"
    
    func main() {
        r := gin.Default()
        r.GET("/ping", func(c *gin.Context) {
            c.JSON(200, gin.H{
                "message": "pong",
            })
        })
        r.Run(":8080") // Listen and Serving HTTP on 0.0.0.0:8080
    }
    

    We might also want to run the following command to remove any unused dependencies:

     $ go mod tidy
    

    Output:

    go: downloading github.com/stretchr/testify v1.7.1
    go: downloading github.com/davecgh/go-spew v1.1.1
    go: downloading github.com/pmezard/go-difflib v1.0.0
    go: downloading gopkg.in/yaml.v3 v3.0.0-20210107192922-496545a6307b
    go: downloading github.com/google/go-cmp v0.5.5
    go: downloading github.com/go-playground/assert/v2 v2.0.1
    go: downloading gopkg.in/check.v1 v1.0.0-20201130134442-10cb98267c6c
    go: downloading github.com/kr/pretty v0.3.0
    go: downloading golang.org/x/xerrors v0.0.0-20191204190536-9bdfabe68543
    go: downloading github.com/kr/text v0.2.0
    go: downloading github.com/rogpeppe/go-internal v1.8.0
    

    Manually run the main.go file and test it:

    $ go run main.go
    

    Visit the site or curl the http://127.0.0.1:8080/ping URl. We should get the following response:

    {"message":"pong"}
    

    Setting up the Gin service

    In order to run the service with systemd service, we will need to build main.go, so we can get a binary file from it:

    $ go build main.go
    

    Create a gin service file at /etc/systemd/system/gin.service with the following content:

    [Unit]
    Description=gin
    
    [Service]
    Type=simple
    Restart=always
    RestartSec=3s
    ExecStart=/var/www/html/gin-project/main
    
    [Install]
    WantedBy=multi-user.target
    

    Start the service and check the status:

    $ systemctl start gin
    $ systemctl status gin
    

    Console Output:

    ● gin.service - gin
         Loaded: loaded (/etc/systemd/system/bin.service; disabled; vendor preset: enabled)
         Active: active (running) since Tue 2022-10-04 07:14:09 UTC; 45s ago
       Main PID: 25971 (main)
          Tasks: 5 (limit: 1119)
         Memory: 5.4M
            CPU: 23ms
         CGroup: /system.slice/gin.service
                 └─25971 /var/www/html/gin-project/main
    

    Setting up OpenLiteSpeed as a Reverse proxy

    The fastest way to set up the OpenLiteSpeed web server with proxy settings is to rely on the ols1clk script with the proxy setup option --proxy-c. It will set up an External Applications – Web Server with default value http://127.0.0.1:8080 and a Proxy Context in the Example virtual host:

    $ bash <( curl -k https://raw.githubusercontent.com/litespeedtech/ols1clk/master/ols1clk.sh) --proxy-c
    

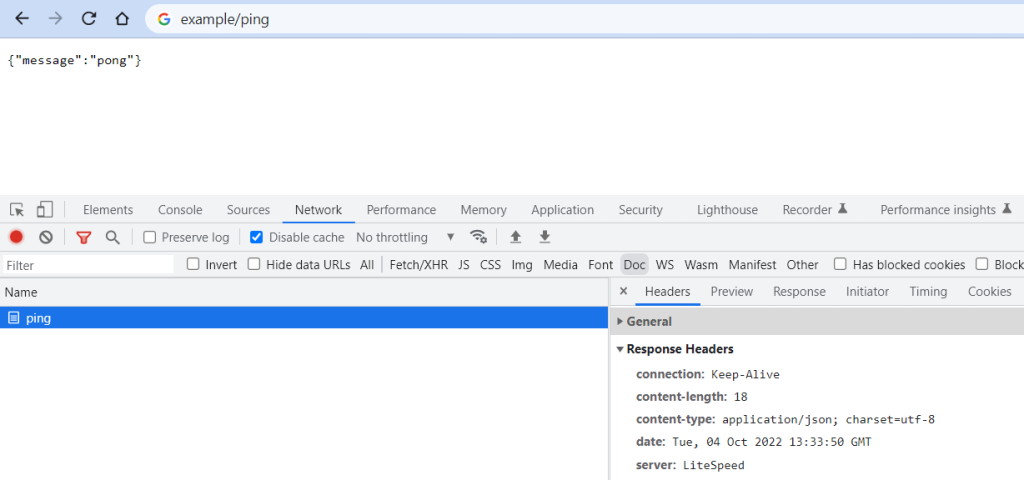
    After the installation, we can visit http://example.com/ping in the browser (replacing example.com with our actual domain):
    OpenLiteSpeed Reverse Proxy Pin

    If we want to modify the default value or add more proxy content for more backend services, we can access the LiteSpeed Web Admin at port 7080 to configure it further.

    Setting up SSL (Optional)

    Setting up an SSL certificate enables HTTPS on the web server, which secures the traffic between the server and the clients connecting to it. Certbot is a free and automated way to set up SSL certificates on a server.

    The first thing is to install the Certbot package to the system:

    $ apt-get install certbot -y
    

    To use Certbot, we’ll need a registered domain name and DNS records:

    • An A record from the domain (e.g., example.com) to the server’s IP address
    • An A record from the domain prefaced with www (e.g., www.example.com) to the server’s IP address.

    Once the DNS records are set up, we can generate the SSL certificate by following the instructions in the OpenLiteSpeed KB.

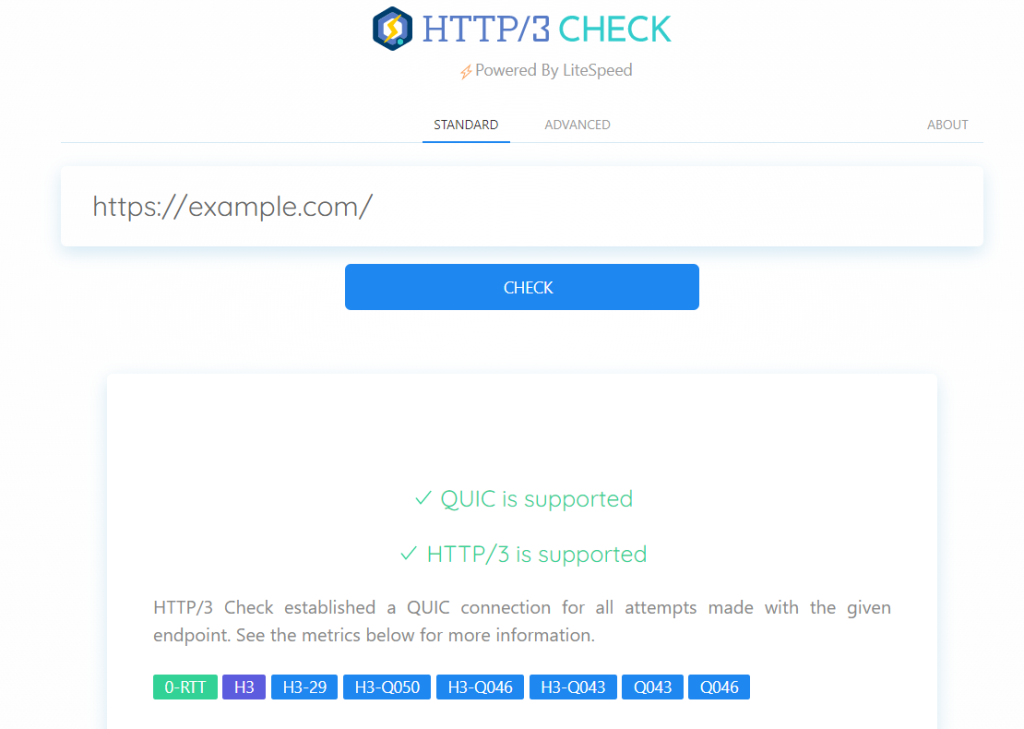
    After setting up SSL on OpenLiteSpeed, we can test our site, or any site on the Internet, with the free HTTP/3 Check tool. Enter a URL, and HTTP/3 Check will tell us whether QUIC or HTTP/3 is supported by that site.

    The HTTP/3 Check Tool

    Configuring Security (Optional)

    There are several built-in security features that we could implement, for example reCAPTCHA, Per-Client Throttling, WAF, etc.

    reCAPTCHA

    OpenLiteSpeed features reCAPTCHA as a method of defense against DDoS attack. When a visitor accesses the website, they will need to go though reCAPTCHA validation. After passing the reCAPTCHA validation, the visitor is temporarily allowlisted as long as they continue to browse the site. Once the visitor has become inactive, reCAPTCHA is once again enabled for that visitor’s next request. We can follow the reCAPTCHA Security Guide to enable the feature.

    Per-Client Throttling

    OpenLiteSpeed includes a built-in Per-Client Throttling feature which allows you to block bad IPs, as well as limit the request, bandwidth, and connection rate per remote IP address. We can follow the Per-Client Throttling Security Guide to enable the feature.

  • Integrated Bubblewrap Support in LiteSpeed Web Servers

    Integrated Bubblewrap Support in LiteSpeed Web Servers

    Bubblewrap in LiteSpeed Web Server

    The LiteSpeed family of high performance web servers offers a number of ways to isolate requests, thereby providing protection against attack. In upcoming releases of LiteSpeed Enterprise (6.0) and OpenLiteSpeed (1.6.15), we have added integrated support for bubblewrap by Flatpak, providing even greater isolation and protection against attack.

    What’s so great about bubblewrap?

    Bubblewrap is a lightweight sandbox application written by Flatpak, and is described in their wiki here. What it does is implement Linux namespaces, which basically gives the application (LiteSpeed in this case) a full sandbox, which includes operating-system-supported isolated mounts, user/group IDs, interprocess communications, users, cgroups, host names and more.

    For example, with isolated mount namespaces: each request can only see the file system designated for that request and can even be denied write access to any files within any directories you specify.

    With isolated users and groups, the user will only be able to see their own user ID, group ID and capabilities. The default even creates independent /etc/passwd and /etc/group files with the contents you specify.

    With isolated interprocess communications each process can only see the named pipes, or Unix Domain Sockets you specify, which limits the applications that a process can contact. It’s impossible to communicate with applications without specified file system access.

    Similar to, but perhaps less comprehensive than, CloudLinux CageFS, a bubblewrap’d process is utterly independent. Thus significantly reducing the opportunities for an attack.

    Why integrate it?

    Use of bubblewrap may be configured into previous versions of LiteSpeed (or other web servers), however, it requires complex reconfiguration of your server in order to call the bwrap program directly, and call your program from it. By integrating it into LiteSpeed, bubblewrap works for a large number of application types and requires a very simple configuration change.

    Integration allows it to operate on CGI applications as well as FCGI applications, which would not be possible without integration.

    How to bubblewrap in LiteSpeed Web Server

    In most cases you can enable bubblewrap in your existing LiteSpeed configuration by setting Bubblewrap Container to On in your security configuration. Details for OpenLiteSpeed are here.

    If you do not customize a Bubblewrap Command (and most users will not) it will use the default of:

    /bin/bwrap --ro-bind /usr /usr --ro-bind /lib /lib --ro-bind-try /lib64 /lib64 --ro-bind /bin /bin --ro-bind /sbin /sbin --dir /var --dir /tmp --proc /proc --symlink../tmp var/tmp --dev /dev --ro-bind-try /etc/localtime /etc/localtime --ro-bind-try /etc/ld.so.cache /etc/ld.so.cache --ro-bind-try /etc/resolv.conf /etc/resolv.conf --ro-bind-try /etc/ssl /etc/ssl --ro-bind-try /etc/pki /etc/pki --ro-bind-try /etc/man_db.conf /etc/man_db.conf --ro-bind-try /home/$USER /home/$USER --bind-try /var/lib/mysql/mysql.sock /var/lib/mysql/mysql.sock --bind-try /home/mysql/mysql.sock /home/mysql/mysql.sock --bind-try /tmp/mysql.sock /tmp/mysql.sock  --unshare-all --share-net --die-with-parent --dir /run/user/$UID '$PASSWD 65534' '$GROUP 65534'
    

    The key to the isolation is the bubblewrap parameters --unshare-all and --share-net.

    • --unshare-all specifies all of the isolation mentioned above.
    • --share-net is required to allow your application access to networking.

    Let’s see the isolation this gives you. The first parameter is simply the location of the bubblewrap program. The rest of the parameters will:

    • Mount the following directories (and their subdirectories) as read-only:
      • /usr
      • /lib
      • /lib64 (if it exists)
      • /bin
      • /sbin
      • /etc/ssl (if it exists)
      • /etc/pki (if it exists)
      • /home/(your user’s directory) (if it exists)
    • Mount the following files as read-only:
      • /etc/localtime (if it exists)
      • /etc/ld.so.cache (if it exists)
      • /etc/resolv.conf (if it exists)
      • /etc/man_db.conf (if it exists)
    • Mount the following files as read-write:
      • /var/lib/mysql/mysql.sock (if it exists)
      • /home/mysql/mysql.sock (if it exists)
      • /tmp/mysql.sock (if it exists).
    • Create the following empty directories:
      • /var
      • /tmp
      • /run/user/(your user’s ID)
    • Create symbolic links:
      • from ../tmp to var/tmp
    • Provide minimal access to:
      • /proc
      • /dev
    • Terminate when LiteSpeed terminates
    • Create custom:
      • /etc/passwd file with only your user’s entry and 65534 (nobody)
      • /etc/group file with only your group’s entry and 65534 (nogroup)

    Most programs will be able to run with these defaults and the result is great protection with minimum configuration.

    If your program is not in one of the mounted directories, uses a file not in the list of files or directories, or needs write access to a file not in the writable list, your program won’t be able to access what it needs and will fail. In that case you will need to create a customized command line.

    How to customize it

    The customization is all in the Bubblewrap Command command line. Basically it uses the bubblewrap parameters from your version of bubblewrap with some additional tokens which LiteSpeed adds to provide better customization:

    • $USER is replaced with the actual user name of your user.
    • $UID is replaced with the user ID of your user.
    • $GID is replaced with the group ID of your group.
    • $PASSWD is replaced with the creation of a custom /etc/passwd file with a single user line in it, for the user you’re running as. If you enclose this option in single quotes you can add space-separated additional users. The default is ’$PASSWD 65535’ which creates a 2 line /etc/hosts file, with your user and the nobody user.
    • $GROUP is just like $PASSWD but creates a custom /etc/group.

    Note that most users will be able to use the default Bubblewrap Command by leaving it blank.

    A simple example

    The simplest example is the worst because it gives your application no additional protections. Set Bubblewrap Container to On and Bubblewrap Command to:

    /bin/bwrap --dev-bind / /

    A better example

    This is a much better example of a Bubblewrap Command as it mounts even fewer files and directories than the default. It includes no /var, no /etc/man_db.conf, no database sockets, and only your user in /etc/passwd and your group in /etc/group:

    bin/bwrap --ro-bind /usr /usr --ro-bind /lib /lib --ro-bind-try /lib64 /lib64 --ro-bind /bin /bin --ro-bind /sbin /sbin --dir /tmp --proc /proc --dev /dev --ro-bind-try /etc/localtime /etc/localtime --ro-bind-try /etc/resolv.conf /etc/resolv.conf --ro-bind-try /etc/ssl /etc/ssl --ro-bind-try /etc/pki /etc/pki --ro-bind-try /home/$USER /home/$USER --unshare-all --share-net --die-with-parent --dir /run/user/$UID $PASSWD $GROUP

    Give it a try!

    To try it, upgrade to a version of LiteSpeed Enterprise or OpenLiteSpeed that supports bubblewrap, and turn it on for an application. This will show you the power of an integrated sandbox like bubblewrap inside of a powerful web server like LiteSpeed.

  • LiteSpeed Web Server or OpenLiteSpeed?

    LiteSpeed Web Server or OpenLiteSpeed?

    LiteSpeed Enterprise or OpenLiteSpeed for WordPress

    You’ve heard about how LiteSpeed Cache can significantly improve your WordPress site’s performance, but there is more than one way to get LiteSpeed Cache. How do you know which option is best for you? Let’s answer that question by taking a closer look at our two web server options: OpenLiteSpeed and LiteSpeed Enterprise.

    Simply put, if you are already an OpenLiteSpeed (OLS) user, or a LiteSpeed Web Server (LSWS) user, and your current choice is working for you, then there is no need to switch. The LiteSpeed Cache Plugin for WordPress (LSCWP) works with either OLS or LSWS to speed up your site.

    But what if you have not yet decided which LiteSpeed server to use? Let’s look at a few common scenarios, and see which web server is best for each.

    If you are… You should use…
    a VPS user with simple non-ecommerce sites OpenLiteSpeed
    running a WooCommerce (or similar eCommerce plugin) site LiteSpeed Enterprise
    more comfortable with Managed WP hosting and full Apache compatibility LiteSpeed Enterprise

    Need more help making a choice? Read on!

    Similarities Between Servers

    Both LiteSpeed servers run on Linux and FreeBSD, and share an impressive list of basic features, including:

    • Support for both common and cutting-edge Internet protocols: HTTP / SPDY / HTTP/2 / QUIC / HTTP/3
    • IPv4 and IPv6 support
    • Language support: PHP, Perl, Ruby, Python, NodeJS, JSP, etc.
    • SAPIs: LiteSpeed API, CGI, FCGI, AJPv13, Proxy
    • Unlimited virtual hosting, both IP-based and name-based
    • Gzip and Brotli compression
    • WebSocket Proxy
    • TLS v1.3
    • CloudLinux CL LVE support

    OLS and LSWS both have the ability to understand Apache rewrite rules, configuration files, and ModSecurity, making it easy to switch from Apache to LiteSpeed. Both servers share an event-driven architecture, comprehensive security options, high availability and many more features, which are listed in full on our website.

    LiteSpeed Cache for WordPress (LSCWP) plugin is supported by both servers. LSCWP has earned a 5-star reputation for good reason. And while the optimization features of the LiteSpeed Cache plugin can, technically, be used with any server (LiteSpeed, Apache, nginx, etc.), the caching features, which are LiteSpeed exclusive, can only be used with a LiteSpeed server product.

    So, how do you choose? Let’s take a closer look at the differences between OpenLiteSpeed and LiteSpeed Enterprise.

    OpenLiteSpeed

    Use OpenLiteSpeed for WordPress

    OpenLiteSpeed, our free, open source web server comes with a powerful cache engine, unlimited worker processes, and community support options.

    OLS understands Apache rewrite rules, however a restart is required in order to process any new or changed .htaccess files. For this reason, OLS is most frequently used for individual sites that don’t change often.

    For those who like working with a control panel, OLS is compatible with DirectAdmin and CyberPanel.

    It’s easy to give OpenLiteSpeed a try. One-click images are available in a variety of cloud services, including Digital Ocean, Amazon Web Services, and Google Cloud Platform.

    Visit openlitespeed.org to see all available installation options.

    LiteSpeed Web Server

    Use LiteSpeed Web Server on WordPress

    LiteSpeed Enterprise is a fully-Apache-compatible drop-in-replacement. LSWS autodetects changes to .htaccess and adjusts as necessary without requiring a restart. For this reason, It is ideal for shared hosting environments where updates are frequent.

    LSWS is compatible with any control panel that was written for Apache. This includes cPanel, Plesk, DirectAdmin and more.

    In addition to the extensive security features shared with OpenLiteSpeed, Enterprise also boasts protection from WordPress Brute Force attacks.

    Like OLS, LSWS features a powerful cache engine. But LSWS’s cache engine goes further with ESI support included. ESI, or Edge Side Includes, allows LiteSpeed to cache mixed public and private content on a single page. It’s especially useful in eCommerce situations.

    ESI makes it possible to cache the following:

    • logged-in users
    • non-ajax-based WooCommerce carts
    • widgets with different cache requirements than the rest of the page

    Other caching solutions require you to exclude pages with such content from their caches. LiteSpeed Enterprise with ESI support allows you to cache all of it.

    LSWS is a licensed product with a number of tiers to fit within any budget. The lowest tier, perfect for personal sites and developers, is the Free Starter, which includes the full-featured LSWS Enterprise software and is available for a single domain with a 2GB VPS. It’s 100% free, forever.

    Site Owner tiers start at $10/month for 5 domains on an 8GB VPS, and Web Hosting tiers are available for agencies and hosting providers who need unlimited domains.

    Visit our website to see all of the licensing options.

    You can also get LiteSpeed Enterprise with Jelastic’s PaaS or find a hosting provider who offers LiteSpeed Web Server.

    Other Options

    The whole point of this article is to help you to choose between OpenLiteSpeed and LiteSpeed Enterprise, and so we don’t want to spend a lot of time talking about other options. But we do want you to know that these options exist! So here is just a very brief overview of our CDN and ADC products. Please feel free to explore the links, to learn more about each.

    QUIC.cloud

    Use QUIC.cloud on WordPress

    Even if you know you want to use LiteSpeed, sometimes it is not feasible to switch to a new server, for whatever reason.

    Our QUIC.cloud CDN is a reverse proxy content delivery network, and is the only CDN that interfaces with the LSCache plugin to intelligently cache all of the content on your WordPress site. Learn more about the benefits of QUIC.cloud.

    LiteSpeed Web ADC

    Use LiteSpeed Web ADC on WordPress

    If you’re managing a clustered environment, consider LiteSpeed Web ADC.

    Our ADC is an affordable, high-performance HTTP load balancer application. Even if your backend servers are not LiteSpeed servers, with LiteSpeed Web ADC on the front end, you can interface with the LSCache plugin across all WordPress sites in the cluster. Learn more about LiteSpeed Web ADC.

    Conclusion

    LiteSpeed’s web server editions share an impressive selection of cutting edge features in common, and you can explore them more fully on our website. However, as we’ve seen, there are some differences between OLS and LSWS, and each server caters to a different audience.

    We hope you now have a better idea of which LiteSpeed server will work for you. If you still have questions, don’t hesitate to ask in the comments, or drop by our Slack workspace for the opportunity to chat with other LiteSpeed enthusiasts.

    Happy Caching!


    This content was last verified and updated in August of 2022. If you find an inaccuracy, please let us know! In the meantime, see our documentation site for the most up-to-date information.

  • LiteSpeed Support in DirectAdmin

    LiteSpeed Support in DirectAdmin

    LiteSpeed Support in DirectAdmin

    If you are a DirectAdmin user (or are looking for an alternative to your current control panel), you’ll be happy to know that DirectAdmin supports both OpenLiteSpeed and LiteSpeed Web Server Enterprise.

    DirectAdmin has always worked nicely with LiteSpeed Enterprise, actually, but now, as of OLS version 1.5.2, you can use your DirectAdmin control panel to manage OpenLiteSpeed as well!

    And that’s not the only good news. Now our popular LiteSpeed Cache Management CLI script, which was formerly only available for cPanel or Plesk users, may be used with DirectAdmin!

    OpenLiteSpeed Support in DirectAdmin

    DirectAdmin version 1.57 or higher, and Custom Build 2.0 are required for installation of OpenLiteSpeed. Getting started is easy. Take a look at the documentation.

    Differences between OLS and LSWS in DA

    The main difference between OpenLiteSpeed and LiteSpeed Enterprise is that OLS will not autodetect an update to .htaccess. OLS is most frequently used for individual sites that don’t change often and it’s suggested that you simply restart OLS to load any new .htaccess file.

    If you are in a situation where you need to frequently update, such as a shared hosting environment, then you’ll want to use LiteSpeed Enterprise.

    LiteSpeed CLI Script Support in DA

    You may be familiar with the LiteSpeed Cache for WordPress Management CLI tool. Previously, it was only available for cPanel and Plesk, but now we are happy to include DirectAdmin support, too. This script allows you to execute basic cache management actions through the terminal or a cron job.

    Batch install and enable LSCache on all of the WordPress installations hosted on the server, broadcast a message to all discovered installations and more. Please see our wiki for a complete list of available commands.

    OpenLiteSpeed Support in DirectAdmin

    We’ve recently released a plugin with a GUI for this functionality. You can download that here.

    LiteSpeed and DirectAdmin

    We demonstrate how to set up LiteSpeed Enterprise on DirectAdmin in this video:

    For more information, please see our documentation:

  • LiteSpeed Beats nginx in HTTP/3 Benchmark Tests

    LiteSpeed Beats nginx in HTTP/3 Benchmark Tests

    HTTP3 LiteSpeed vs. nginx

    LiteSpeed’s HTTP/3 implementation outperforms that of the hybrid nginx/quiche in a battery of benchmark tests. OpenLiteSpeed transfers resources more quickly, scales better, and uses less CPU and memory while doing it. In each of these metrics, LiteSpeed betters nginx by a factor of 2 or more. nginx could not complete some tests, while in others, it achieved only a fraction of TCP speed. Below, we describe the setup and the various benchmarks.

    Why Compare LiteSpeed and nginx HTTP/3 Now?

    HTTP/3 is a new protocol for the web, a successor to both Google QUIC and HTTP/2. As the QUIC Working Group at IETF is getting closer to finalizing the drafts, the nascent HTTP/3 implementations are maturing and some are now starting to see production use.

    LiteSpeed was the first to ship HTTP/3 support in LSWS in July of this year. We have been supporting QUIC since 2017, making improvements along the way. The HTTP/3 support rests on this foundation.

    Several weeks ago, Cloudflare released a special HTTP/3 patch for nginx, encouraging everyone to experiment. Because nginx is our competitor, we were excited to get a chance to kick nginx’s shiny new HTTP/3 tires. Cloudflare uses this patch in production, so it has to be good!

    Cloudflare’s Quiche Patch

    Quiche is an HTTP/3 and QUIC library by Cloudflare. It is written in Rust, a new high-level language. The library provides a C API, which is how it is used by nginx.

    Benchmark Setup

    Platform

    Both servers and the load tool are run on the same VM, which is a Ubuntu-14 machine with 32 GB of RAM and 20-core Intel Xeon E7-4870. The bandwidth and RTT are modified using netem.

    Web Servers

    For LiteSpeed, we use OpenLiteSpeed, which is the open-source version of our flagship LiteSpeed Web Server. We use version 1.6.4, which can be downloaded here.

    For nginx, we use 1.16.1 with the Cloudflare quiche patch. Compilation steps are described here.

    Both OpenLiteSpeed and nginx were configured to use one worker process. To be able to issue 1,000,000 requests using 100 connections, nginx’s maximum requests setting was increased to 10,000.

    # OpenLiteSpeed
    httpdWorkers      1
    
    # nginx
    worker_processes  1;
    http {
      server {
        access_log off;
        http3_max_requests 10000;
      }
    }
    

    Website

    The website is a simple selection of static files: 163-byte index file and files of 1 MB, 10 MB, 100 MB, and 1 GB in size. You can use this script to generate these.

    Load Tool

    We use h2load with HTTP/3 support to generate load. It is built very easily using the supplied Dockerfile.

    Benchmark Tests

    To get each number — requests per second or time to fetch a resource — three tests were run and the median value was taken.

    Fetching small page

    The index page is 163 bytes. We will fetch it in several ways using different network conditions.

    h2load options of interest:

    • -n: Total number of requests to send
    • -c: Number of connections
    • -m: Number of concurrent requests per connection
    • -t: Number of h2load threads

    -n 10000 -c 100

    OLS nginx
    100 mbps, 100 ms RTT 935 reqs/sec 890 reqs/sec
    100 mbps, 20 ms RTT 3915 reqs/sec 2910 reqs/sec
    100 mbps, 10 ms RTT 6420 reqs/sec 4100 reqs/sec

    -n 100000 -c 100 -t 10

    This is a longer run, each connection will now send 1000 requests

    OLS nginx
    100 mbps, 100 ms RTT 985 reqs/sec 980 reqs/sec
    100 mpbs, 20 ms RTT 4650 reqs/sec 4525 reqs/sec
    100 mbps, 10 ms RTT 8450 reqs/sec 7155 reqs/sec

    OpenLiteSpeed is a little faster at 100 ms and significantly faster at 20 ms and 10 ms RTT.

    -n 100000 -c 100 -m 10 -t 10

    OLS nginx
    100 mbps, 100 ms RTT 9010 reqs/sec 7365 reqs/sec
    100 mpbs, 20 ms RTT 24,700 reqs/sec 5850 reqs/sec *
    100 mbps, 10 ms RTT 25,230 reqs/sec 6855 reqs/sec *

    * High variance

    Tellingly, in the very first test, nginx was using 100% CPU, while OpenLiteSpeed was using about 45% CPU. This is the reason nginx numbers do not improve as the RTT goes down. On the other hand, OpenLiteSpeed, still does not use 100% CPU even with 20 and 10 ms RTTs.

    -n 1000000 -c 100 -m 10 -t 10

    To issue more than 1000 requests per connection, we need to set nginx’s http3_max_requests parameter to 10000 from its default value of 1000.

    OLS nginx
    200 mbps, 10 ms RTT 29,900 reqs/sec 7180 reqs/sec *

    * High variance

    Now we’ve managed to get OpenLiteSpeed to use 100% CPU. During this test, nginx allocated more than 1 GB of memory (resident size, as shown by top(1)). OLS never exceeded 28 MB.

    That’s more than 4 times the performance at about 1/37th the cost.

    Fetching single file

    In this scenario, we will fetch a single file under different network conditions and measure how long it takes to download the file.

    10 MB

    OLS nginx
    10 mbps, 100 ms RTT 9.8 sec 11.2 sec
    10 mpbs, 20 ms RTT 9.7 sec 10.8 sec
    10 mbps, 10 ms RTT 9.4 sec 10.8 sec

    We see that nginx is somewhat slower in this test. At the same time, it uses a lot more CPU than OpenLiteSpeed in each of the tests above: between 3 and 4 times more.

    100 MB

    OLS nginx
    100 mbps, 100 ms RTT 12.2 sec 40 sec *
    100 mpbs, 20 ms RTT 9.4 sec 40 sec *
    100 mbps, 10 ms RTT 9.3 sec 30 sec

    * High variance

    In all three benchmarks, nginx used 100% CPU, which is the most likely reason for its poor performance.

    1 GB

    I tried testing downloading 1 GB file using nginx at 1 Gbps but I got tired of waiting for it to finish. My guess is that the performance difference between OLS and nginx is even more drastic at this speed.

    Shallow Queue

    We have seen that nginx struggles when bandwidth is high. Let’s see how it does when bandwidth is low. One twist is that we will use a shallow queue using netem’s limit parameter. Here, we will set it to 7.

    Fetching single 10 MB file

    limit OLS nginx
    5 mbps, 20 ms RTT 1000 * 19.6 sec 22.5 sec
    5 mbps, 20 ms RTT 7 29.6 sec 48.1 sec

    * netem default

    Introducing a shallow queue on path reduces OLS performance by about 50%, whereas nginx performance is degraded by more than 100%. In both cases, LiteSpeed is significantly faster than nginx.

    OpenLiteSpeed HTTP/3 is Better Than nginx

    We compared OpenLiteSpeed and nginx using several types of benchmarks. In all tests, LiteSpeed performs better than nginx: it transfers files faster and uses less CPU and memory. nginx never reaches TCP-level throughput at low bandwidth. At high bandwidth, nginx throughput is a fraction of that of LiteSpeed.

    nginx’s HTTP/3 is not ready for production use. It delivers poor performance and, at the same time, uses too much CPU and memory.

    This result is not surprising. QUIC and HTTP/3 are complex protocols. New implementations will have a hard time matching the performance of LiteSpeed. Ours is a mature implementation, as we first shipped production-grade QUIC support back in the summer of 2017.

    nginx will likely improve in the future. We look forward to more benchmark testing when that occurs. Until then, LiteSpeed HTTP/3 cannot be beat.

  • BBR Control in QUIC and HTTP/3

    BBR Control in QUIC and HTTP/3

    BBR Congestion Control in QUIC and HTTP/3

    BBR congestion control is now available for LiteSpeed QUIC and the upcoming HTTP/3.

    The newly released LiteSpeed Web Server 5.4.2, Web ADC 2.6.0, and OpenLiteSpeed 1.6.1 use BBR congestion control for QUIC connections. BBR (which stands for Bottleneck Bandwidth and RTT) is a new congestion control algorithm developed by Google in the last few years. It features several profitable properties.

    Resistance to Loss

    The main idea behind BBR is that packet loss may not mean that there is congestion in the network. For example, a packet may be lost due to transient radio interference. Cubic and other congestion-based algorithm do not distinguish between such spurious losses and real congestion, reducing their send rate in both cases. BBR, on the other hand, is not so easily spooked.

    As a result, BBR can deliver sustained throughput performance even in the face of suboptimal network conditions.

    Minimal Latency

    Bufferbloat has been the bane of good UX for years. Since the problem was identified and alarm sounded, there have been changes to network infrastructure equipment to avoid buffering too much data. Nevertheless, the fact remains: Cubic will try to fill the bottleneck buffer on the network path, increasing connection latency. A study of 4G LTE networks reveals that to mask packet loss, buffers are used extensively, thereby inflating RTT.

    BBR keeps track of the bottleneck bandwidth and periodically tests for minimum round-trip time. These estimates are used by the sender to avoid filling the bottleneck buffer. With BBR, an interactive web application is more likely to be responsive.

    Drawbacks

    Despite its terrific advantages, BBR is not without problems. It performs poorly when there are shallow buffers on the path and it may not be fair to other flows, claiming most of available bandwidth. These issues will be addressed in BBRv2, which is being actively developed at Google.

    Test Results

    Throughput Under Loss

    To compare BBR to Cubic, I set up a pre-release build of LSWS 5.4.2 and conducted a few experiments downloading a static file from the web server using the LiteSpeed QUIC client. The bottleneck was set up on the client side using netem and ifb.

    Rate (MBit/sec) Delay (ms) Loss (%) Cubic (sec) BBR (sec)
    20 25 0 4.5 4.5
    20 25 0.5 6.7 4.6
    20 25 1 8.6 4.6
    20 25 2 14.3 4.7
    20 25 3 17.6 4.7

    Table 1: Time to transfer 10 MB file, in seconds

    It is evident that Cubic is very sensitive to packet loss, while BBR is not.

    Latency

    To test the difference in latency between Cubic and BBR, we set up a simple website with three resources: an HTML page with links to two files: one large and one tiny. The bottleneck was set up to have 20 MBit/sec bandwidth and 25 ms delay with a large buffer. The user clicks on the large file and it begins downloading. The user then clicks on the small file. When Cubic is used, it takes one to two seconds to download the small file:


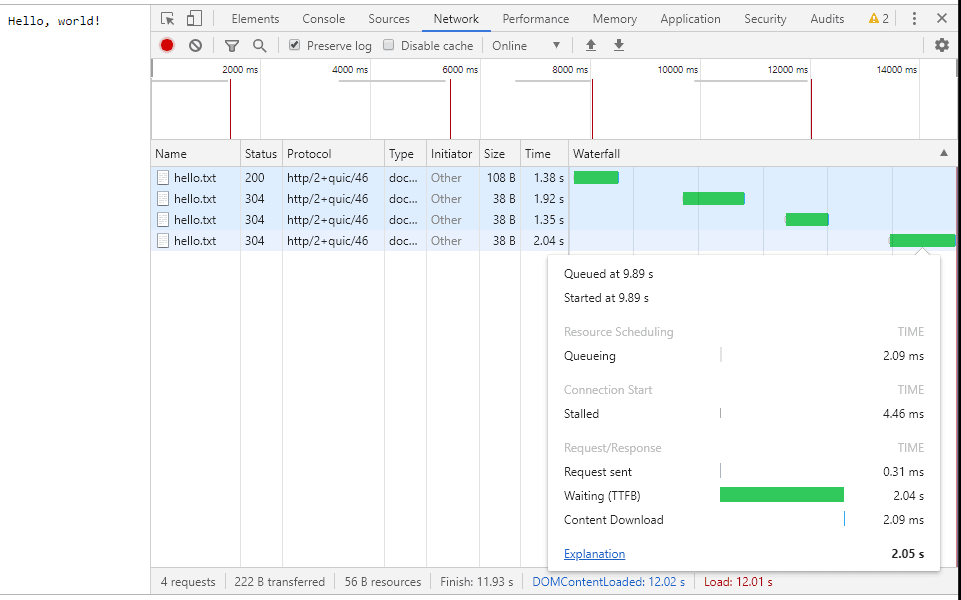
    Figure 1: Downloading small file when server uses Cubic

    This is because Cubic tries to fill the intermediate buffer. BBR, on the other hand, keeps the bottleneck buffer filled “just right” so that downloading a small file take on the order of RTT:


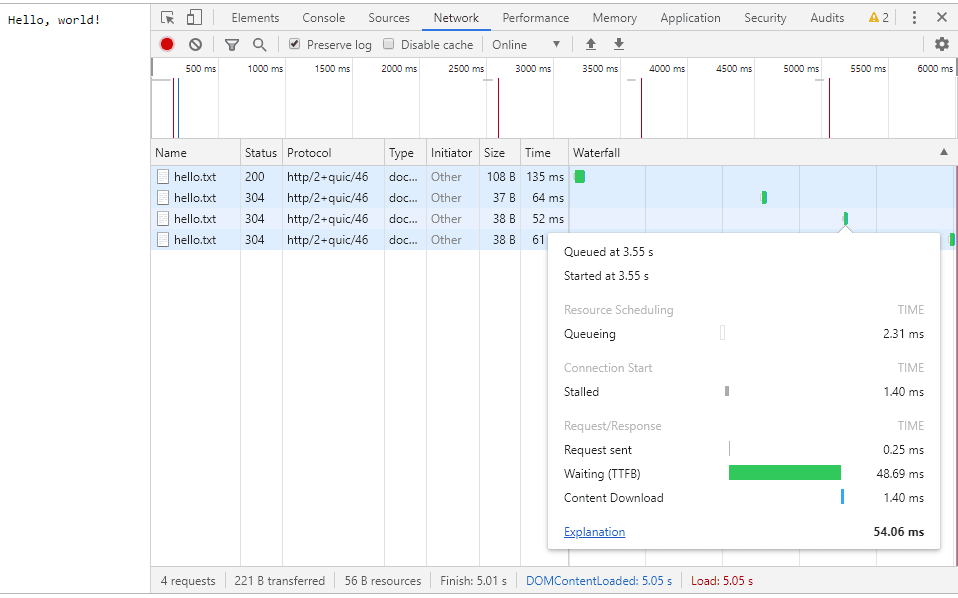
    Figure 2: Downloading small file when server user BBR

    BBR Congestion Control in QUIC and HTTP/3

    BBR is a novel congestion control technology. It has two advantages over the widely-deployed Cubic congestion control: insensitivity to random loss and low latency. With LiteSpeed, you can take advantage of this technology today to power your server’s Google QUIC and HTTP/3 connections.

    As Google evolves BBR, we will continue to support the most recent stable version.