Tag: cloudflare

  • WpW: Cloudflare Management in LSCache

    WpW: Cloudflare Management in LSCache

    CloudFlare Management in LSCache for WordPress

    Welcome to another installment of WordPress Wednesday! Today’s topic: Cloudflare Management in LSCache.

    Disclaimer: The information contained in this post is accurate for LSCWP v1.7.2 [release log]. If you are using a newer version of the plugin, some details may have changed. Please refer to our wiki for the latest!

    As of v1.7.2, you have the ability to manage certain aspects of your Cloudflare cache from within the LiteSpeed Cache for WordPress plugin.

    This topic looks familiar

    If you are getting sense of déjà vu right about now, it’s because we have talked about Content Delivery Networks before. We introduced CDN support in October of last year, but at the same time, we told you not to use it if you were getting your CDN service through Cloudflare.

    Why? Cloudflare is actually a distributed proxy server. Most other CDNs are reverse proxies, which are not the same thing. As a result, the two types of CDN require entirely different configuration options.

    CloudFlare Management in LSCache for WordPress

    If you are perfectly happy with the way you currently manage your Cloudflare cache, you may continue to do what you have always done and leave LSCache’s Cloudflare API setting disabled. They will continue to work together just fine.

    For the rest of you, enabling the Cloudflare API allows you to do all of your optimization and cache management from the dashboard of one handy and familiar plugin: LSCache!

    Setting it up
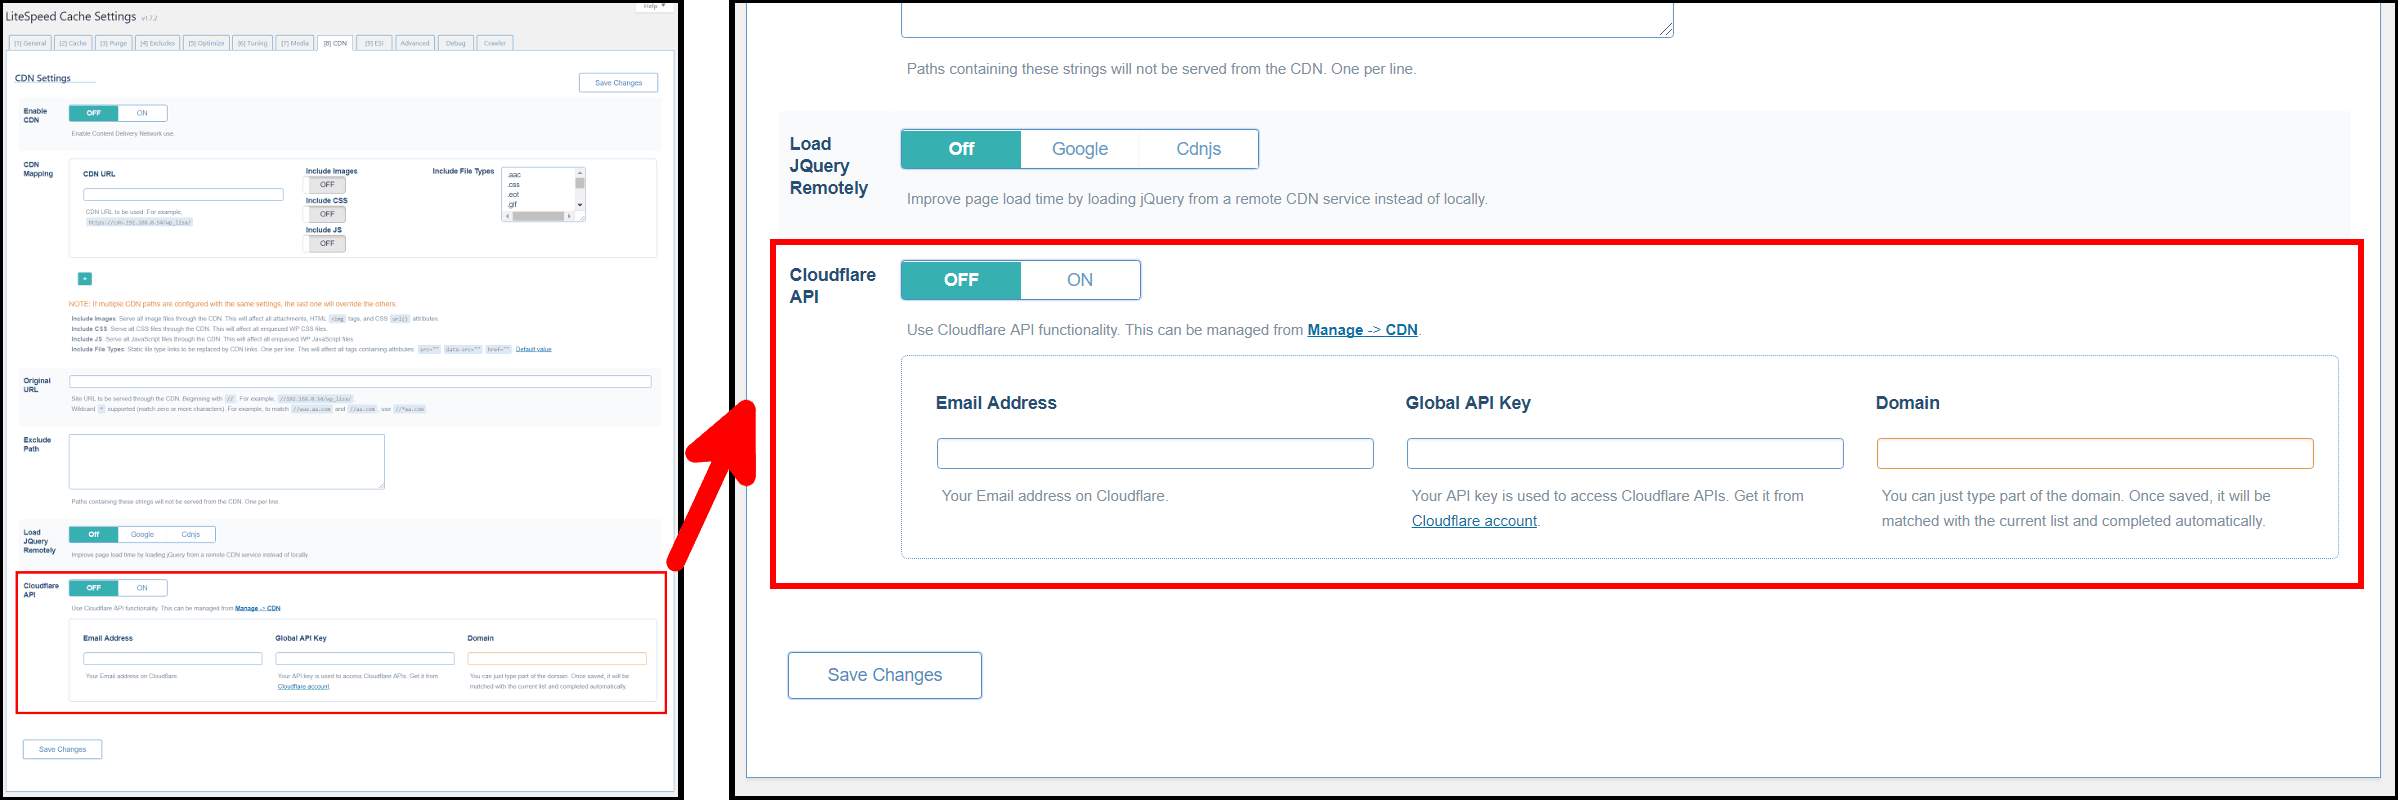
    LSCache for WordPress CDN Settings Tab

    Cloudflare isn’t like other CDNs, therefore you should not set Enable CDN to ON for Cloudflare.

    You can, however, manage your Cloudflare cache through this plugin in another way: simply navigate to LiteSpeed Cache > Settings > CDN, scroll down, set Cloudflare API to ON and then fill in the three fields below. Save the settings. From now on you may manage your Cloudflare cache through the LiteSpeed Cache > Manage > CDN area!

    Email Address

    Enter the email address you use with your Cloudflare account.

    Global API Key

    Enter the API key you were given by Cloudflare. You can find it on your Cloudflare profile.

    Domain

    Enter the domain name served by Cloudflare. You needn’t enter the entire domain here. If you enter only part of it, LSCache will discover and fill in the remainder of the domain automatically after save.

    Managing Cloudflare via LSCache
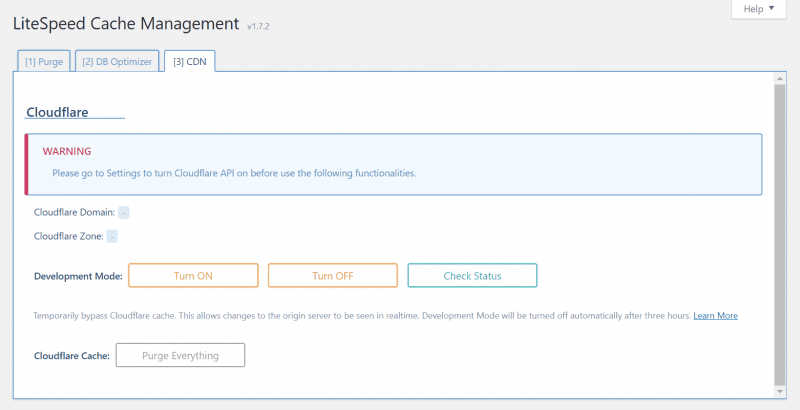
    LSCache for WordPress CDN Management

    Cloudflare Domain

    This is the domain that you have configured to be served by Cloudflare. It is informational only and cannot be changed here. If it doesn’t match your actual Cloudflare domain, you will need to fix it in your Cloudflare account.

    Cloudflare Zone

    This is the unique id that was assigned to your domain by Cloudflare. It is informational only and cannot be changed here. You can see it on your Cloudflare profile.

    Development Mode

    These buttons allow you to turn on Development Mode, turn it off, and check to see whether it is running. If you are making updates to your site, and want to verify that they are working as planned, Development Mode allows you to temporarily disable Cloudflare so that you may see your updates in realtime.

    After three hours, Development Mode will turn itself off, or you can turn it off manually via the button provided.

    Purge

    Press this button to purge your Cloudflare cache on demand. This is helpful if you have made changes that result in an LSCache purge, and you want to make sure Cloudflare is purged as well.

    And that’s it! We hope you enjoy this enhancement. If you have any questions, as always, we are here to answer them!


    Have some of your own ideas for future WordPress Wednesday topics? Leave us a comment!

    Don’t forget to meet us back here next week for the next installment. In the meantime, here are a few other things you can do:

  • WpW: How to Set Up a CDN with LSCache

    WpW: How to Set Up a CDN with LSCache

    Welcome to another installment of WordPress Wednesday!

    Disclaimer: The information contained in this post is accurate for LSCWP v5.0. If you are using a newer version of the plugin, some details may have changed. Please refer to our documentation for the latest!

    LiteSpeed Cache for WordPress has the ability to support your Content Delivery Network usage. This quick guide should explain how the different settings between your CDN and LiteSpeed relate to each other.

    Cloudflare

    Make sure you have set up your Cloudflare account on the Cloudflare website. Once that’s done, switch over to your WordPress Dashboard and navigate to LiteSpeed Cache > CDN > CDN Settings.

    To manage Cloudflare through the LSCache plugin, set the following:

    • QUIC Cloud CDN: OFF
    • Use CDN Mapping: OFF, and leave all settings under it alone
    • Cloudflare API: ON, and fill in your Email Address, Global API Key, and Domain

    NOTE: You can also use Cloudflare without managing it through LSCache. If that is what you choose, just set Cloudflare API to OFF, and leave all settings under it alone. Cloudflare will work either way. The advantage of setting this up in LSCache is that you may purge your Cloudflare cache or enable Cloudflare’s Development Mode from within LSCache. If that doesn’t matter to you, feel free to skip this setup.

    QUIC Cloud

    The QUIC.cloud onboarding process is documented in the QUIC.cloud Knowledge Base, and explains how to set up everything from the LSCache plugin to your QUIC.cloud Dashboard.

    Other Reverse-Proxy CDNs

    CNAME setup in the CDN

    For this guide, we’re going to assume you have already set up your CDN account, and added your site (let’s call it example.com) according to the CDN’s instructions.

    Make sure that your CDN is configured to cache static files only. Dynamic content will be handled by LiteSpeed.

    Your CDN configuration screen should have an area for adding a CNAME record. Look for it under DNS Editor or something along those lines.

    The goal here is to set up a custom domain to be used only by the CDN. For example, cdn.example.com. Follow the CDN’s instructions for adding the CNAME record.

    Once that is complete, and the domain is active, we’ll be ready to tell WordPress how to proceed.

    LiteSpeed Cache CDN Settings

    Now that your CDN is set up and your static content is ready to be served by the CDN, you will need to let WordPress know about it. You can do this through LiteSpeed Cache.

    In your WordPress Dashboard, navigate to LiteSpeed Cache > CDN > CDN Settings.

    Make sure both QUIC Cloud CDN and Cloudflare API are set to OFF.

    • Use CDN Mapping: ON.
    • CDN URL: http://cdn.example.com.
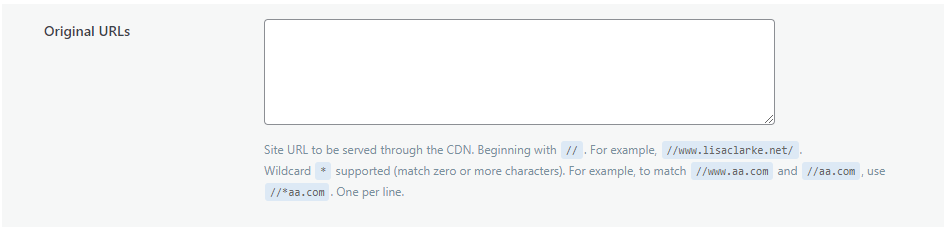
    • Original URLs: //example.com.

    The remaining settings can be left as-is, unless you have a specific reason to change them. If you do want to adjust them, this documentation should help.

    And that’s it! Once you save your changes, LiteSpeed Cache for WordPress will substitute the CDN URL for the Original URL in the static copies it saves of your dynamically-generated code, wherever appropriate.

    Want to learn more about how all of this works? We’ve written about our CDN support in some depth before. You can check that out here.

    Have some of your own ideas for future WordPress Wednesday topics? Leave us a comment!

    Don’t forget to meet us back here next week for the next installment. In the meantime, here are a few other things you can do:


    This content was last verified and updated in July of 2022. If you find an inaccuracy, please let us know! In the meantime, see our documentation site for the most up-to-date information.