Category: LiteSpeed Web ADC

Learn more about LiteSpeed Web ADC. Our load balancer and application delivery controller fits easily into your existing infrastructure, offering better performance at significantly lower cost.  A 100% software solution, LiteSpeed Web ADC can run anywhere – private dedicated hardware, hosted environments, clouds, etc.

  • HTTP/2 Bomb Vulnerability

    HTTP/2 Bomb Vulnerability

    Here is what you need to know about LiteSpeed and the HTTP/2 Bomb vulnerability:

    • HTTP/2 Bomb is a remote denial-of-service exploit that exists in many servers’ default HTTP/2 configurations.
    • LiteSpeed server products (including LiteSpeed Web Server Enterprise, LiteSpeed Web ADC, and OpenLiteSpeed) are effectively not vulnerable to HTTP/2 Bomb attacks

    Who is affected by HTTP/2 Bomb?

    The HTTP/2 Bomb vulnerability was announced this week on the Calif Substack after having previously been disclosed to nginx and Apache, who then released their own patches. Other servers, not including LiteSpeed, have since been included in the “affected” list.

    LiteSpeed Web Server is an Apache drop-in replacement, but LiteSpeed does not share any code with Apache.

    LiteSpeed’s from-the-ground-up implementation of Apache-compatible systems means that LiteSpeed is usually not subject to the same vulnerabilities as Apache. That is indeed the case with the HTTP/2 Bomb vulnerability.

    How are LiteSpeed Users Protected?

    We assessed the vulnerability and concluded that there is only one situation in which LiteSpeed servers may be exploitable by the HTTP/2 Bomb vulnerability:

    • If an IP address is added to the Trusted IP list, and is intentionally allowed to abuse the server, the HTTP/2 Bomb may have an effect.

    We don’t anticipate that many admins have trusted their attacker’s IPs, but even if they have, the amplification rate is roughly 30x to 40x. This should not be enough to bring down a server.

    Just the same, we will add some tightening around this scenario in upcoming server product releases.

    If you are using LiteSpeed Web Server Enterprise, LiteSpeed Web ADC, or OpenLiteSpeed, there is nothing you need to do right now. You are already immune to this attack, assuming your Trusted IP list contains only truly trustworthy IPs.

  • LiteSpeed Security Update

    LiteSpeed Security Update

    LiteSpeed Security Update

    We have a security update for LiteSpeed’s QUIC and HTTP/3 Library (LSQUIC), and all three LiteSpeed server products. Recently we were made aware of a vulnerability affecting LSQUIC. We patched this vulnerability in v4.3.1.

    Please update to the latest versions of LSQUIC and all LiteSpeed server products.

    This Allocation of Resources Without Limits or Throttling vulnerability, reported by Yohann Sillam from Imperva Offensive Team, has been assigned CVE-2025-54939.

    Impact

    UDP packets, crafted in a particular way and sent to the HTTP/QUIC service port, can cause an unbounded memory leak. This has the potential to cause the process or the server to run out of memory, eventually leading to a Denial of Service.

    This vulnerability in the LSQUIC Library affects all server products and may be easily exploited.

    Actions

    We strongly recommend that those using the QUIC and HTTP/3 library upgrade to LSQUIC version 4.3.1 or higher to patch this vulnerability.

    Additionally, those who are using LiteSpeed server products, should upgrade to the following versions of these products immediately:

    • LiteSpeed Web Server (LSWS) v6.3.4 or higher
    • LiteSpeed Web ADC (LSADC) v3.3.1 or higher
    • OpenLiteSpeed (OLS) v1.8.4 or higher

    If you cannot upgrade your server at this time, you can disable HTTP/3 to avoid this vulnerability.

    Timeline

    • July 15, 2025: We were alerted to the issue.
    • July 18, 2025: Patch was added to our internal repo to be included in all subsequent builds of our commercial server products
    • August 1, 2025: Released LSWS v6.3.4 and OLS v1.8.4
    • August 4, 2025: Released LSADC v3.3.1
    • August 13, 2025: Released LSQUIC v4.3.1 to the GitHub repository

    Conclusion

    We thank Imperva Offensive Team for bringing this issue to our attention. This vulnerability has been patched, so if you are keeping your LSQUIC library or your LiteSpeed server products up-to-date, there is nothing you need to do. If you have not updated in a while, please do so today.

  • 2025 So Far

    2025 So Far

    2025 so far
    We are more than halfway through 2025, and we wanted to take this opportunity to tell you what we’ve been doing this year, in case you’ve missed anything. We’ve released updates to three cache plugins, three control panel plugins, and all three server products!

    Cache Plugins

    First, let’s take a look at what’s new with our LiteSpeed Cache plugins for WordPress, PrestaShop, and Magento.

    WordPress

    We released three LSCWP updates in the last six months. In addition to dozens of minor changes and bug fixes, these new features were among the updates:

    • AVIF support in v7.0
    • Allowlist support for Critical CSS in v7.1
    • Cloudflare cache clear on Purge All in v7.2

    This is just the tip of the iceberg, though. There’s a lot more. See the full release log.

    PrestaShop

    For v1.5.2 of LSCPS, we made a few minor updates: we fixed some bugs, we added parameter support to ESI block widgets, and we improved compatibility with Smarty and Symphony caches.

    See the release log.

    Magento

    LiteMage v2.2.5 had just a minor release, which included a bug fix, and an update which removed the jQuery dependency for custom varies.

    See the release log.

    Servers

    Our server products were updated this year to use a new version of LSQUIC. (A hash flood vulnerability was addressed in our LSQUIC HTTP/3 Library in February with the v4.2.0 release.)

    LiteSpeed Web Server

    We released LSWS v6.3.2 and v6.3.3, which included new features, security updates, and a number of bug fixes. See the full release log here.

    New features include:

    • Improvements to HTTP/2’s ability to block aggressive robots when under attack
    • Improved support for LiteSpeed Containers and Redis in control panels
    • The ability to selectively disable anti-DDoS detection

    The security updates addressed the LSQUIC vulnerability, and an issue with stderr.log permissions.

    OpenLiteSpeed

    OLS v1.8.3 updated LSQUIC and added support for “expect: 100 continue” handling.

    See the release log.

    Web ADC

    Our LSADC v3.3.0 release improved both HTTP/2 and HTTP/3 with stronger anti-DDoS capabilities, and stream priority adjustments.

    See the release log.

    Control Panel Plugins

    Our control panel plugins for cPanel/WHM, Plesk, and DirectAdmin all got a brand new Flag All button for the Cache Management feature.

    Additionally, in cPanel and WHM we addressed a minor security issue, and added some improvements related to the Cache Redis for Users feature.

    We released the following plugin updates:

    • cPanel v2.4.1-v2.4.3 and WHM v5.1.2-v5.2.3
    • Plesk v2.1.3-v2.2.0
    • DirectAdmin v2.4

    See the release logs.

    Stay Tuned

    We’ve got a lot more in store for the rest of 2025. Thanks for coming along for the ride!

  • LSQUIC Security Update

    LSQUIC Security Update

    We have a security update for LiteSpeed’s QUIC and HTTP/3 Library (LSQUIC). Recently we were made aware of a vulnerability affecting several QUIC implementations, including LSQUIC. We patched this vulnerability in v4.2.0.

    Please update to the latest version of LSQUIC.

    This Hash-based Denial-of-Service vulnerability, reported by Paul Bottinelli, Cryptography and Security Consultant at NCC Group, has been assigned CVE-2025-24947.

    Impact

    Several QUIC implementations, including LSQUIC, use a hash table to store Secure Connection IDs (or, SCIDs) as indices to connection data. If the hash function is weak, an attacker can trigger a denial-of-service attack by initiating connections with colliding SCIDs, causing significant slow downs.

    LSQUIC, while technically vulnerable to this type of attack, has a rate limiting feature. If there are too many INIT packets for new connections, a Retry packet will be triggered. This means, LSQUIC doesn’t put the client-generated SCID in the hash. As such, in a real-world deployment, this vulnerability is not easy to exploit with LSQUIC.

    Previously, we used XXH32(), which is prone to hash collisions, to generate a 32-bit hash key. With v4.2.0, LSQUIC has switched to rapidhash, which allows us to generate a stronger random seed, and produces a 64-bit hash key.

    Our test shows that it addresses the hash collision issue well. Here are some examples:

    without seed 
    211C6C858BB29CDD408F1EBDAA43A980CE016B71 -> F3C569EBDE612455
    211CEC85DBB29CDE418F1EBDAA43A980CF214B71 -> F3C569EBDE612455
    with seed 
    211C6C858BB29CDD408F1EBDAA43A980CE016B71 -> 3173D06C62EB64E2
    211CEC85DBB29CDE418F1EBDAA43A980CF214B71 -> EF06763606005C05
    without seed 
    211C6C858BB29CDD408F1EBDAA43A980CE016B71 -> 56B71185739E534A
    211CEC85DBB29CDE418F1EBDAA43A980CF214B71 -> 56B71185739E534A
    with seed 
    211C6C858BB29CDD408F1EBDAA43A980CE016B71 -> D18323CAAFD14A5A
    211CEC85DBB29CDE418F1EBDAA43A980CF214B71 -> 190C4F2674528BE1
    without seed 
    211C6C858BB29CDD408F1EBDAA43A980CE016B71 -> 9183B84F3AE05847
    211CEC85DBB29CDE418F1EBDAA43A980CF214B71 -> 9183B84F3AE05847
    with seed 
    211C6C858BB29CDD408F1EBDAA43A980CE016B71 -> D05A92D1069111F3
    211CEC85DBB29CDE418F1EBDAA43A980CF214B71 -> 3150BF22FFAA28E4
    

    Actions

    We recommend that those using the QUIC and HTTP/3 library upgrade to LSQUIC version 4.2.0 or higher to patch this vulnerability.

    Those who are using LiteSpeed server products, including LiteSpeed Web Server (LSWS), LiteSpeed Web ADC (LSADC), and OpenLiteSpeed (OLS), should upgrade to the latest versions of these products.

    Timeline

    • January 10, 2025: We were alerted to the issue.
    • January 15, 2025: Patch was added to our internal repo to be included in all subsequent builds of our commercial server products
    • February 18, 2025: Released LSWS v 6.3.2, LSADC v3.3.0, and OLS v1.8.3
    • February 18, 2025: Released LSQUIC v4.2.0 to the GitHub repository

    Conclusion

    We thank Paul Bottinelli for bringing this issue to our attention. This vulnerability has been patched, so if you are keeping your LSQUIC library or your LiteSpeed server products up-to-date, there is nothing you need to do. If you have not updated in a while, please do so today.

  • LiteSpeed Not Vulnerable to HTTP/2 Continuation Flood

    LiteSpeed Not Vulnerable to HTTP/2 Continuation Flood

    LiteSpeed Not Vulnerable to HTTP/2 CONTINUATION Flood Vulnerability

    Here is what you need to know about the HTTP/2 CONTINUATION Flood vulnerability, specifically CVE-2024-27316, and LiteSpeed:

    • The vulnerability allows an attack that uses unbounded header buffering to overwhelm servers
    • LiteSpeed servers are not vulnerable to HTTP/2 CONTINUATION Flood

    What is Continuation Flood?

    The HTTP/2 CONTINUATION Flood vulnerability was announced yesterday as Vulnerability Note #421644 published by the CERT Coordination Center.

    The note states:

    An attacker that can send packets to a target server can send a stream of CONTINUATION frames that will not be appended to the header list in memory but will still be processed and decoded by the server or will be appended to the header list, causing an out of memory (OOM) crash.

    The note goes on to specify a number of CVE listings specific to certain HTTP/2 implementations, including the following:

    • CVE-2024-27983 (node.js)
    • CVE-2024-27919 and CVE-2024-30255 (Envoy)
    • CVE-2024-2758 (Tempesta)
    • CVE-2024-2653 (amphp/http)
    • CVE-2023-45288 (Go)
    • CVE-2024-28182 (nghttp2)
    • CVE-2024-31309 (Apache Traffic Server)

    CVE-2024-27316 is of particular interest because it applies to the Apache Httpd implementation:

    HTTP/2 CONTINUATION frames without the END_HEADERS flag set can be sent in a continuous stream by an attacker to an Apache Httpd implementation, which will not properly terminate the request early.

    LiteSpeed Web Server is an Apache drop-in replacement, but LiteSpeed does not share any code with Apache.

    LiteSpeed’s from-the-ground-up implementation of Apache-compatible systems means that LiteSpeed is usually not subject to the same vulnerabilities as Apache. That is indeed the case with the HTTP/2 CONTINUATION Flood vulnerability.

    How are LiteSpeed Users Protected?

    LiteSpeed Web Server, OpenLiteSpeed, and LiteSpeed Web ADC’s HTTP/2 implementation applies a 64K upper limit for total header buffering. If the limit is reached, the connection is closed.

    Attackers attempting to exploit this vulnerability on LiteSpeed Web Server will find their efforts thwarted after a mere 64K.

  • Server Improvements Under the Hood

    Server Improvements Under the Hood

    LiteSpeed Web Server and Web ADC Updates

    LiteSpeed Web Server and LiteSpeed Web ADC both got significant updates at the end of 2023. Let’s look under the hood to see how these new updates can make your LiteSpeed experience even better!

    RE2 in ModSecurity

    LiteSpeed’s sleek and performant ModSecurity engine now supports the RE2 regular expression library. You can stick with the PCRE library that Apache, nginx, and others currently use, or you can switch to RE2, which comes with a resource-management advantage.

    PCRE commonly faces infinite-looping and thread-blocking issues when processing large input with poorly written patterns. This is a fatal problem for a high-performance, event-driven server. LiteSpeed minimizes the impact of thread blocking by using a thread pool that is separate from the main loop. But despite these measures, as PCRE’s resource usage grows exponentially, it can still cause a server to slow down.

    Computational resource consumption by RE2, on the other hand, grows only linearly and is more predictable.

    RE2 offers a slightly smaller number of features than PCRE does. However, RE2 is faster than PCRE when using certain operators like Boolean OR (|).

    Bottom line: if PCRE is working for you, there is no need to switch. But if you are seeing high CPU utilization, and you think ModSecurity could be to blame, try using RE2, and see if that helps. Navigate to WebAdmin Console > Server > Security > Web Application Firewall (WAF) and select Use RE2 regex engine.

    QUIC v2

    In March of 2023, we updated our LSQUIC HTTP/3 Library to use QUIC v2. Since then, we’ve taken our time integrating QUIC v2 into our server products. This has allowed for maximum testing time and confidence before rolling it out.

    As of LSWS v6.2 and LSADC v3.2, QUIC v2 is in production.

    Request Header Validation

    Request header validation is now more strict. As of these new versions, our validator checks for NULL bytes in the header value, and Transfer-Encoding value manipulation. If either of these is detected, a 400 bad request is returned.

    LSWS Apache Compatibility

    We have three compatibility improvements to share.

    First up, Litespeed now supports the new flags recently added to Apache’s rewrite engine:

    • BNP
    • backrefnoplus
    • BCTLS
    • BNE

    Second, we now support RewriteCond expr '<expression>'.

    And third, we squashed a bug that was preventing us from supporting dynamic regular expression matching. The issue was with variables in the pattern, as seen in SSI code like this:

    <!--#if expr="$referrer = /$host/" –>
    

    LiteSpeed could support fixed regular expression patterns in Apache expressions, but failed when variables were used. This issue is now solved, and LiteSpeed Web Server v6.2 fully supports dynamic regular expression matching.

    Web ADC HEAD Caching

    LiteSpeed Web ADC now supports HEAD caching. Separate cache entries will be created for HEAD requests, to avoid unnecessary hits to the back end, and to improve the cache hit rate.

    Conclusion

    Have you updated LiteSpeed Web Server or LiteSpeed Web ADC yet? The new versions are stable and ready to serve!

    If you’re new to LiteSpeed and want to take one of these products out for a spin, sign up for a 15-day trial, today:

  • How to use Configuration Templates

    How to use Configuration Templates

    LiteSpeed Virtual Host Configuration Templates

    Introduction

    If you are using OpenLiteSpeed, LiteSpeed Web ADC, or native LiteSpeed Web Server Enterprise without a control panel, you can take advantage of virtual host configuration templates.

    Today we’ll show you how templates work, go over some benefits, and walk you through an example usage.

    Benefits of Templating

    When you host multiple websites on one server, you may find that many of them have similar configurations. With LiteSpeed’s virtual host template feature, you can create many virtual hosts from one master template and edit all of their configurations at once. Plus, configuring a new vhost can be as simple as connecting it to the template.

    How Configuration Templates Work

    Each template contains three things:

    1. a configuration file
    2. a list of mapped listeners, and
    3. a list of member virtual hosts.

    Creating a Template

    To create a brand new template, navigate to WebAdmin Console > Configuration > Virtual Host Templates > Add. You will be asked to fill out basic information for this template. One of the fields will require the location of your template file. If you do not have a template file yet, that’s fine. You can make up a new file name and LiteSpeed will create it for you in $SERVER_ROOT/conf/templates/.

    For the purposes of this blog post, let’s call your new template mytemplate.

    Once you’ve added mytemplate, you don’t need to configure any more settings, though you will probably want to.

    Most of the settings in a virtual host template are comparable to normal virtual host settings. The main difference is that you can use the $VH_NAME variable in template settings to stand in for the names of the virtual hosts that you will be applying the template to.

    Applying a Template to a Virtual Host

    A virtual host template does nothing until you assign it to some member virtual hosts.

    Virtual host template settings are located in the WebAdmin Console under Configuration > Virtual Host Templates. That is where you can find a list of your existing templates.

    To add virtual hosts to mytemplate, click mytemplate and navigate to Template > Member Virtual Hosts > Add. Each virtual host you add will be automatically configured with the mytemplate settings. The member virtual host’s name will be substituted anywhere that $VH_NAME appears in the template settings. And listener-to-virtual host mapping will be added automatically for all listeners in the template’s mapped listener list.

    Making Changes to a Template

    In the WebAdmin Console, navigate to Configuration > Virtual Host Templates, and click View/Edit next to mytemplate, (or whichever template you wish to edit).

    When you update the settings in a virtual host template, all of the member virtual hosts will automatically take on the new settings.

    You will need to perform a Graceful Restart to put your updates into effect.

    Default Templates

    Our server products may come with some default virtual host templates, which can be found in the $SERVER_ROOT/conf/templates/ directory.

    LiteSpeed Web Server has three, for the three most common types of virtual hosts:

    • centralConfigLog is good for basic virtual hosts that will use the same server root directories and share a common directory naming framework.
    • PHP_SuEXEC contains a setup ideal for hosting external PHP applications running in suEXEC mode. PHP scripts for member virtual hosts will be executed as the owner of the virtual host’s document root.
    • EasyRailsWithSuEXEC is just like the PHP_SuEXEC template, but for Ruby on Rails applications.

    Example

    Let’s set up a new template in the LiteSpeed WebAdmin Console.

    1. Click Configuration > Listeners and delete the default port 80 listener.
    2. Click Add. Set the following, and click Save:
      1. Listener name: http
      2. Port: 80
      3. Binding Not set
    3. Repeat step 2 to create an https listener for port 443.
    4. Configure an SSL certificate for the https listener.
    5. Click the Virtual Host Templates tab and click Add. Set the following, and click Save:
      1. Template Name: mytemplate (or whatever name you would like to use)
      2. Template file: /usr/local/lsws/conf/templates/mytemplate.xml
      3. Mapped Listeners:http, https
    6. Click View/Edit on mytemplate. Click the General tab, and click Edit. Set the following, and click Save:
      1. Default Virtual Host Root: /home/$VH_NAME/
      2. Config file: /usr/local/lsws/conf/vhosts/$VH_NAME.xml
      3. Document Root: /home/$VH_NAME/public_html
    7. Click the Security tab. Set the following, and click Save:
      1. External App Set UID Mode: DocRoot UID
      2. suEXEC User: $VH_NAME
      3. suEXEC Group: $VH_NAME
    8. Click the External App tab and choose the LiteApeed SAPI App type. Set the following, and click Save:
      1. Name: $VH_NAME_lsphp81 (we are using PHP v8.1 in this example, but you can use any version you like)
      2. Address: uds://tmp/lshttpd/$VH_NAME.sock
      3. Max Connections: 3
      4. Initial Request Timeout (secs): 60
      5. Retry Timeout (secs): 30
      6. Connection Keepalive Timeout: -1
      7. Command: /usr/local/lsws/lsphp81/bin/lsphp
      8. Run as user: $VH_NAME
      9. Run as group: $VH_NAME
    9. Click the Script Handler tab and click Add. Set the following, and click Save:
      1. Suffixes: php
      2. Handler type: LiteSpeed SAPI
      3. Handler name: [VHost Level]: $VH_NAME_lsphp81
    10. Click the Template tab and click Add. Set the following, and click Save:
      1. Virtual Host Name: site1 (or any name of your choice)
      2. Domain: site1.com
      3. Aliases: www.site1.com
    11. Click the Add button again. Set the following, and click Save:
      1. Virtual Host Name: site2 (or any name of your choice)
      2. Domain: site2.com
      3. Aliases: www.site2.com
    12. Repeat step 11 for every virtual host that you want to add with this template.
    13. Click Graceful restart to apply your changes

    Testing

    Once the template is created and the site1 and site2 virtual hosts are added as members, you can (1) test that the sites exist, (2) check the file system to verify that their document roots are in the correct place, as defined by the template, and (3), verify that each site owns a running PHP processes, as defined by the template.

    1. In a browser window, verify that you can successfully visit site1.com and site2.com.
    2. Verify that document roots exist in /home/site1/public_html and /home/site2/public_html.
    3. Run: ps -aux | grep lsphp. This command will show you any lsphp processes running, and you can verify that they are owned by site1:site1 and site2:site2.

    Conclusion

    You should now know why templates are useful, and you should be able to create one and assign virtual hosts as members.

    If you’d like to learn more, you can see our wiki on the subject, or take a look at these instructions for creating a template to be used with LiteSpeed Web ADC and Kubernetes.

  • Gateway API Power for LiteSpeed Ingress Controller

    Gateway API Power for LiteSpeed Ingress Controller

    Gateway API Power for LiteSpeed Ingress Controller

    The LiteSpeed Ingress Controller expands the very powerful LiteSpeed WebADC engine into the Kubernetes cluster space for load-balancing. Introducing new Gateway API power for LiteSpeed Ingress Controller.

    The LiteSpeed documentation introduces the features available in the Gateway API. The Gateway API introduction focuses on the role-oriented nature of the new features and these are very useful. This blog will go further and show you some of the advanced features available using the Gateway API which were previously available but only as proprietary extensions.

    The Gateway API now standardizes some of the more complex needs many customers have in their Kubernetes environments. In particular red-blue and canary deployments. These features have been available using the LiteSpeed Ingress Controller for some time and this blog will show you a new way to implement them.

    Red-Blue and Canary Deployments

    As described in the Advanced Deployments section of the LiteSpeed documentation, when you have a new image of software and want to try it out on a subset of users. Say, give it to 10% of your user population and see if there are problems. This is typically described as a “canary deployment.” You might want to increase the percentage until most of the population is using it, and then pass over control completely to the new group.

    Or you may want to set up the deployment, and swap it over knowing you can swap it back quickly. That’s a “red-blue deployment.”

    Also supported by Gateway is 100% header-based routing for the safest of canary deployments.

    Red-blue deployment

    Red-Blue Deployment with Gateway via LiteSpeed

    Our first example will be to modify the Gateway example described in our documentation for olsup-gw.sh and we’ll create a red-blue deployment where you can switch between the old and new software quickly and easily. The modifications we’ll make below can be applied to the running pods and will take effect when executed.

    The first step would be to download and extract the samples. Note that the version number is in the file and we’d recommend taking the newest version. For the version 0.2.0:

    $ wget https://github.com/litespeedtech/helm-chart/raw/main/helm-chart-sources/ls-k8s-webadc/samples/ls-k8s-webadc-0.2.0.tgz
    $ tar xf ls-k8s-webadc-0.2.0.tgz
    $ cd ls-k8s-webadc

    And then bring up the sample gateway. We’ll be using it as a test base here.

    $ ./olsup-gw.sh

    In that example you have a Deployment, Service, Gateway and HTTPRoute. For the new version you wish to deploy, you’ll need a new Deployment and Service to make your new software available. Modeled on the examples/ols-backend.yaml, the new Deployment definition is named new-backend.yaml and looks like this:

    apiVersion: apps/v1
    kind: Deployment
    metadata:
      name: new-backend
    spec:
      selector:
        matchLabels:
          app: new-backend
      replicas: 2
      template:
        metadata:
          labels:
            app: new-backend
        spec:
          containers:
          - name: new-backend
            image: k8s.gcr.io/echoserver:1.10
            imagePullPolicy: Always
            ports:
            - containerPort: 8080
    

    The only differences are the names which must change and the image itself, which would always change for a new version. For this example, we’re using an image which is completely different so that we can see when it uses the new image.

    For the Service definition, create a new file named new-backend-svc.yaml modeled after ols-backend-svc.yaml:

    apiVersion: v1
    kind: Service
    metadata:
      name: new-backend-svc
    spec:
      selector:
        app: new-backend
      ports:
      - port: 80
        targetPort: 8080
        name: new-backend-http
    

    All that is changed are the names. Apply them so they’ll be available:

    $ kubectl apply -f new-backend.yaml -n sandbox
    $ kubectl apply -f new-backend-svc.yaml -n sandbox

    Surprisingly, the Gateway definition does not have to change at all. Only the HTTPRoute needs to change. From the original definition, modify it to add a single line, weight: 100 and save it as httproute-red-weight-old.yaml:

    apiVersion: gateway.networking.k8s.io/v1beta1
    kind: HTTPRoute
    metadata:
      name: ols-gateway.com
    spec:
      parentRefs:
      - name: ols-gateway.com
      hostnames:
      - ols-gateway.com
      rules:
      - matches:
        - path:
            value: /
            type: PathPrefix
        backendRefs:
        - name: ols-backend-svc
          port: 80
          weight: 100
    

    You can then immediately apply it. It will have no affect because weight is not based on a percentage or any other numbering system and defaults to 1. However, most examples use the percentage based assumption for simplicity and compatability.

    $ kubectl apply -f httproute-red-weight-old.yaml -n sandbox

    As described in the gateway doc, you can test it using curl. kubectl get gateway -n sandbox ols-gateway.com will return the address. You can then use it with curl:

    $ curl https://ADDRESS/ -H 'Host: ols-gateway.com' -k

    This should return the LiteSpeed server default screen’s HTML.

    To begin the new “blue” deployment, create a new definition and save it as httproute-blue-weight-new.yaml

    apiVersion: gateway.networking.k8s.io/v1beta1
    kind: HTTPRoute
    metadata:
      name: new-gateway.com
    spec:
      parentRefs:
      - name: ols-gateway.com
      hostnames:
      - ols-gateway.com
      rules:
      - matches:
        - path:
            value: /
            type: PathPrefix
        backendRefs:
        - name: new-backend-svc
          port: 80
          weight: 100
    

    Because it uses the existing gateway parentRefs name, we use the existing name and the existing hostname. However, we use the service name we created and assign a weight of 100 to represent that it gets 100% of the traffic. When you are ready to give it a try, you can apply it:

    $ kubectl apply -f httproute-blue-weight-new.yaml -n sandbox

    For the moment, both the old and new software will see traffic. To turn traffic off on the old site, copy the httproute-red-weight-old.yaml file to httproute-blue-weight-old.yaml and edit it, changing the weight to 0:

    apiVersion: gateway.networking.k8s.io/v1beta1
    kind: HTTPRoute
    metadata:
      name: ols-gateway.com
    spec:
      parentRefs:
      - name: ols-gateway.com
      hostnames:
      - ols-gateway.com
      rules:
      - matches:
        - path:
            value: /
            type: PathPrefix
        backendRefs:
        - name: ols-backend-svc
          port: 80
          weight: 0
    

    And apply it:

    $ kubectl apply -f httproute-blue-weight-old.yaml -n sandbox

    If you again run the same curl you ran above, you can see the change in the output to a listing of the HTTP header. Keeping the files around gives you a quick and easy way to switch between old and new software.

    To remove all that you did you can reverse the entire process, with the final step being to take down the sample gateway:

    $ kubectl delete -f httproute-blue-weight-old.yaml -n sandbox
    $ kubectl delete -f httproute-blue-weight-new.yaml -n sandbox
    $ kubectl delete -f new-backend-svc.yaml -n sandbox
    $ kubectl delete -f new-backend.yaml -n sandbox
    $ ./olsdown-gw.sh

    Canary testing with headers

    Canary Deployments with Gateway via LiteSpeed

    The HTTP protocol includes easily modified request headers which allow a tester to reach the new software without giving the regular browser user access to it. Gateway allows you to match on received headers and query strings which gives you a choice of which method to test with. Query strings can be modified in a brower and thus make some sense for testing there, but since many applications count on the contents of a query string to be specifically defined, this example will use headers which are easily manipulated with curl. Note that using query strings is no more complicated than the method using headers here.

    Either method gives developers and testers a way to deploy into a live environment without worrying about affecting production users since users will not generally have access to these mechanisms. As a last step in development before final deployment, it can be important as it gives you assurance that you can survive live internet attacks, access to real databases, performance verification, load testing and everything that the real environment provides.

    We’ll be using the LiteSpeed Gateway samples and the deployment and service we created above.

    As above, start by running the olsup-gw.sh script and apply the deployment and service we created above.

    $ ./olsup-gw.sh
    $ kubectl apply -f new-backend.yaml -n sandbox
    $ kubectl apply -f new-backend-svc.yaml -n sandbox

    Also as above, the Gateway definition does not have to change at all. Even the HTTPRoute does not need to change as the absence of the new header will not affect traffic to the old backend.

    To begin a canary deployment, create a new canary definition and save it as httproute-canary-hdr.yaml

    apiVersion: gateway.networking.k8s.io/v1beta1
    kind: HTTPRoute
    metadata:
      name: new-gateway.com
    spec:
      parentRefs:
      - name: ols-gateway.com
      hostnames:
      - ols-gateway.com
      rules:
      - matches:
        - headers:
          - name: canary
            value: new
          path:
            value: /
            type: PathPrefix
        backendRefs:
        - name: new-backend-svc
          port: 80
    

    Because it uses the existing gateway parentRefs name, we use the existing name and the existing hostname. However, we use the service name we created and assign a header canary:new. When you are ready to give it a try, you can apply it:

    $ kubectl apply -f httproute-canary-hdr.yaml -n sandbox

    Test access to the old software using the old access technique with curl:

    $ curl https://ADDRESS/ -H 'Host: ols-gateway.com' -k

    Test access to the new software by adding the required header:

    $ curl https://ADDRESS/ -H 'Host: ols-gateway.com' -k -H 'canary:new'

    To remove all that you did you can reverse the entire process, with the final step being to take down the sample gateway:

    $ kubectl delete -f httproute-canary-hdr.yaml -n sandbox
    $ kubectl delete -f new-backend-svc.yaml -n sandbox
    $ kubectl delete -f new-backend.yaml -n sandbox
    $ ./olsdown-gw.sh

    Canary deployment 90%-10%

    Our final example will be to modify the Gateway example described in our documentation for olsup-gw.sh and we’ll create a canary deployment where 90% of the traffic goes to the old software and 10% to the new. We’ll be using the LiteSpeed Gateway samples and the deployment and service we created above.

    As above start by running the olsup-gw.sh script and apply the deployment and service we created above.

    $ ./olsup-gw.sh
    $ kubectl apply -f new-backend.yaml -n sandbox
    $ kubectl apply -f new-backend-svc.yaml -n sandbox

    As above, the Gateway definition does not have to change at all. Only the HTTPRoute needs to change. From the original definition, modify it to add a single line, weight: 90 and save it as httproute-canary-weight-old.yaml:

    apiVersion: gateway.networking.k8s.io/v1beta1
    kind: HTTPRoute
    metadata:
      name: ols-gateway.com
    spec:
      parentRefs:
      - name: ols-gateway.com
      hostnames:
      - ols-gateway.com
      rules:
      - matches:
        - path:
            value: /
            type: PathPrefix
        backendRefs:
        - name: ols-backend-svc
          port: 80
          weight: 90
    

    You can then immediately apply it. It will have no affect because weight is not based on a percentage or any other numbering system and defaults to 1. However, most examples use the percentage based assumption for simplicity and compatability.

    $ kubectl apply -f httproute-canary-weight-old.yaml

    As described in the gateway doc, you can test it using curl. kubectl get gateway -n sandbox ols-gateway.com will return the address. You can then use it with curl:

    $ curl http://ADDRESS/ -H 'Host: ols-gateway.com'

    This should return the LiteSpeed server default header.

    To begin a canary deployment, create a new canary definition and save it as httproute-canary-weight-new.yaml

    apiVersion: gateway.networking.k8s.io/v1beta1
    kind: HTTPRoute
    metadata:
      name: new-gateway.com
    spec:
      parentRefs:
      - name: ols-gateway.com
      hostnames:
      - ols-gateway.com
      rules:
      - matches:
        - path:
            value: /
            type: PathPrefix
        backendRefs:
        - name: new-backend-svc
          port: 80
          weight: 10
    

    Because it uses the existing gateway parentRefs name, we use the existing name and the existing hostname. However, we use the service name we created and assign a weight of 10 to represent that it gets 10% of the traffic. When you are ready to give it a try, you can apply it:

    kubectl apply -f httproute-canary-weight-new.yaml -n sandbox
    

    Because of caching there’s no good way to test it. When a curl is done from the same machine, you’ll get the same entry you get the first time. Take our word for the fact that 10% of the traffic will be sent to the canary backend.

    To remove all that you did you can reverse the entire process, with the final step being to take down the sample gateway:

    $ kubectl delete -f httproute-canary-weight-old.yaml -n sandbox
    $ kubectl delete -f httproute-canary-weight-new.yaml -n sandbox
    $ kubectl delete -f new-backend-svc.yaml -n sandbox
    $ kubectl delete -f new-backend.yaml -n sandbox
    $ ./olsdown-gw.sh

    Just scratching the surface

    All of these techniques just scratch the surface of what you can do with gateway. We’ve demonstrated switching between old and new dynamically, using a header and using weights. As mentioned above you can also use query strings. You can also select on host name using wildcards (better than those for Ingress), and multiple levels of path, headers and query strings. You can add, set or delete headers to allow control of your backends. There are a whole set of role features. Gateway adds a whole new world to Kubernetes.


  • Horizontally Auto-scale LiteSpeed Ingress Controller

    Horizontally Auto-scale LiteSpeed Ingress Controller

    Horizontally Auto-scale LiteSpeed Ingress Controller

    One of the many cool features about Kubernetes is its ability to scale when load increases. And the LiteSpeed Ingress Controller has several built-in features which helps enable horizonal scaling of itself:

    • Prometheus style metrics, which can be exported to Prometheus or Grafana and help you visually or programmatically determine the load level.
    • Auto-scaling helm options, which will detect when load is high and automatically scale up and scale back down when load abates.

    This blog will walk you though the following processes on your Kubernetes Cluster:

    This blog assumes little prior experience with Kubernetes, but does expect you to have kubectl and helm installed. You should have access to your cluster available to the console user and familiarity with text editing

    Installing a simple application

    This step uses a small application named PodInfo which simply returns some static text. The text is resolved into a browser image, if run in a browser. However, if run by a load generator, it returns a minimal amount of text.

    To install it, use the text editor of your choice and create the file named 1-podinfo.yaml with the following contents:

    apiVersion: apps/v1 
    kind: Deployment 
    metadata: 
      name: podinfo 
    spec: 
      selector: 
        matchLabels: 
          app: podinfo 
      template: 
        metadata: 
          labels: 
            app: podinfo 
        spec: 
          containers: 
          - name: podinfo 
            image: stefanprodan/podinfo 
            ports: 
            - containerPort: 9898 
    --- 
    apiVersion: v1 
    kind: Service 
    metadata: 
      name: podinfo 
    spec: 
      ports: 
        - port: 80 
          targetPort: 9898 
          nodePort: 30001 
      selector: 
        app: podinfo 
      type: NodePort 
    ---
    apiVersion: networking.k8s.io/v1 
    kind: Ingress 
    metadata: 
      name: podinfo 
    spec: 
      ingressClassName: lslbd
      rules: 
        - host: "example.com" 
          http: 
            paths: 
              - backend: 
                  service: 
                    name: podinfo 
                    port: 
                      number: 80 
                path: / 
                pathType: Prefix 
    

    Once saved, apply it with kubectl:

    $ kubectl apply -f 1-podinfo.yaml

    Accessing an exposed application in a Kubernetes cluster

    To verify it was installed, find the external IP address of the exposed node it’s running on. In Kubernetes, images are deployed to pods which run on these nodes. To get the node it was run in:

    $ kubectl get pods -o=wide|grep podinfo

    In my environment, it returned a single line:

    podinfo-7dc5f49b9b-s4spd                          1/1     Running   0          26h     10.244.2.93      pool-e85y5p9p2-7jkcs   <none>           <none>
    

    In column 7, it reports the node that it was run in; for me that is pool-e85y5p9p2-7jkcs. Remember that name. Then get the list of external IP addresses for your nodes:

    $ kubectl get nodes -o=wide

    Which displays on my system:

    NAME                   STATUS   ROLES    AGE   VERSION    INTERNAL-IP      EXTERNAL-IP       OS-IMAGE                       KERNEL-VERSION          CONTAINER-RUNTIME
    pool-e85y5p9p2-7jkc5   Ready    <none>   5d    v1.21.14   10.136.121.238   159.223.189.158   Debian GNU/Linux 10 (buster)   5.10.0-0.bpo.15-amd64   containerd://1.4.13
    pool-e85y5p9p2-7jkck   Ready    <none>   5d    v1.21.14   10.136.121.235   147.182.135.113   Debian GNU/Linux 10 (buster)   5.10.0-0.bpo.15-amd64   containerd://1.4.13
    pool-e85y5p9p2-7jkcs   Ready    <none>   5d    v1.21.14   10.136.121.237   137.184.105.17    Debian GNU/Linux 10 (buster)   5.10.0-0.bpo.15-amd64   containerd://1.4.13
    

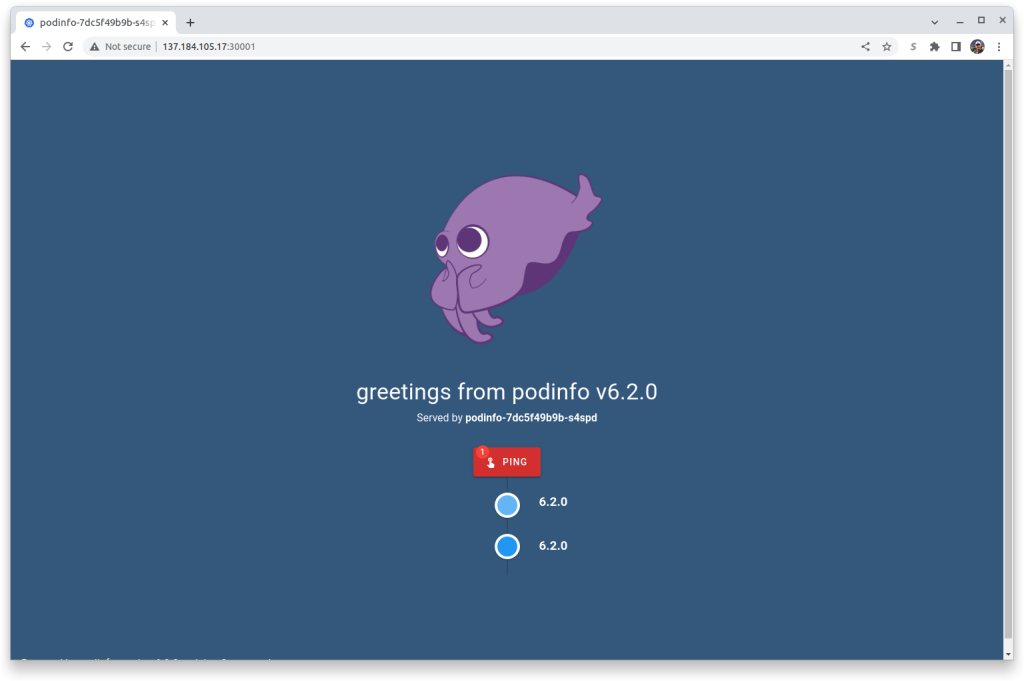
    And I can see that the pool pool-e85y5p9p2-7jkcs has external IP address of 137.184.105.17. Since the sample exports the application on port 30001 on that IP, you can bring up a browser and enter in the url: http://[YOUR IP ADDRESS]:30001, which for me is: http://137.184.105.17:30001:

    Scaling Demonstration Application

    Installing the LiteSpeed Ingress Controller

    To install the LiteSpeed Ingress Controller you’ll need to follow the basic instructions here. For this excercise you can skip the section Making HTTPS Work. The important change is in Installing the Chart. The helm install line should look like this (assuming that you’re using the namespace ls-k8s-webadc:

    $ helm install ls-k8s-webadc ls-k8s-webadc/ls-k8s-webadc -n ls-k8s-webadc --set service.metrics.enabled="true",autoscaling.enabled="true"

    This is the normal helm install, but also includes the LiteSpeed helm options to enable metrics and autoscaling.

    Installing Prometheus

    This is an optional step, as it just allows you to see the impact that autoscaling has in your environment. By setting the LiteSpeed Ingress Controller helm option of service.metrics.enabled="true" you are enabling metric exporting from the LiteSpeed Ingress Controller automatically into a Prometheus installed on the cluster. This is generally a low-overhead operation and is quite useful for monitoring LiteSpeed’s operations. To install Prometheus:

    $ helm repo add prometheus-community https://prometheus-community.github.io/helm-charts
    $ helm install prometheus prometheus-community/prometheus --set server.service.type=NodePort --set server.service.nodePort=30010

    Accessing Prometheus in a Kubernetes cluster

    To then access Prometheus from a web browser, use the trick above:

    $ kubectl get pods -o=wide|grep prometheus-server

    In my environment, it returned a single line:

    prometheus-server-57f4946cdb-x54rh                2/2     Running   0          40h     10.244.3.17      pool-e85y5p9p2-7jkc5   <none>           <none>
    

    In column 7, it reports the node that it was run in; for me that is pool-e85y5p9p2-7jkc5. Remember that name. Then get the list of external IP addresses for your nodes:

    $ kubectl get nodes -o=wide

    Which displays on my system:

    NAME                   STATUS   ROLES    AGE   VERSION    INTERNAL-IP      EXTERNAL-IP       OS-IMAGE                       KERNEL-VERSION          CONTAINER-RUNTIME
    pool-e85y5p9p2-7jkc5   Ready    <none>   5d    v1.21.14   10.136.121.238   159.223.189.158   Debian GNU/Linux 10 (buster)   5.10.0-0.bpo.15-amd64   containerd://1.4.13
    pool-e85y5p9p2-7jkck   Ready    <none>   5d    v1.21.14   10.136.121.235   147.182.135.113   Debian GNU/Linux 10 (buster)   5.10.0-0.bpo.15-amd64   containerd://1.4.13
    pool-e85y5p9p2-7jkcs   Ready    <none>   5d    v1.21.14   10.136.121.237   137.184.105.17    Debian GNU/Linux 10 (buster)   5.10.0-0.bpo.15-amd64   containerd://1.4.13
    

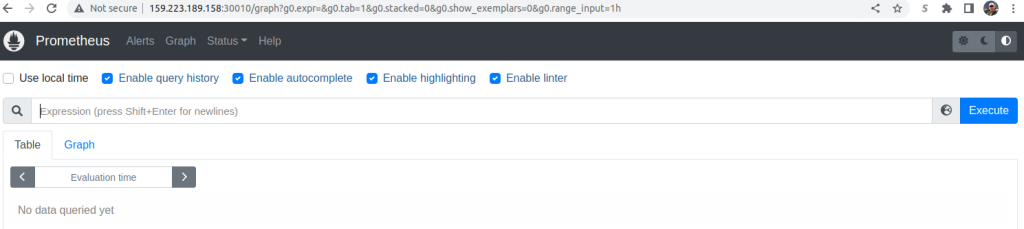
    And I can see that the pool pool-e85y5p9p2-7jkc5 has external IP address of 159.223.189.158. Since the helm install command line exports the application on port 30010 on that IP, you can bring up a browser and enter in the url: http://[YOUR IP ADDRESS]:30010, which for me is: http://159.223.189.158:30010:

    Entering Prometheus

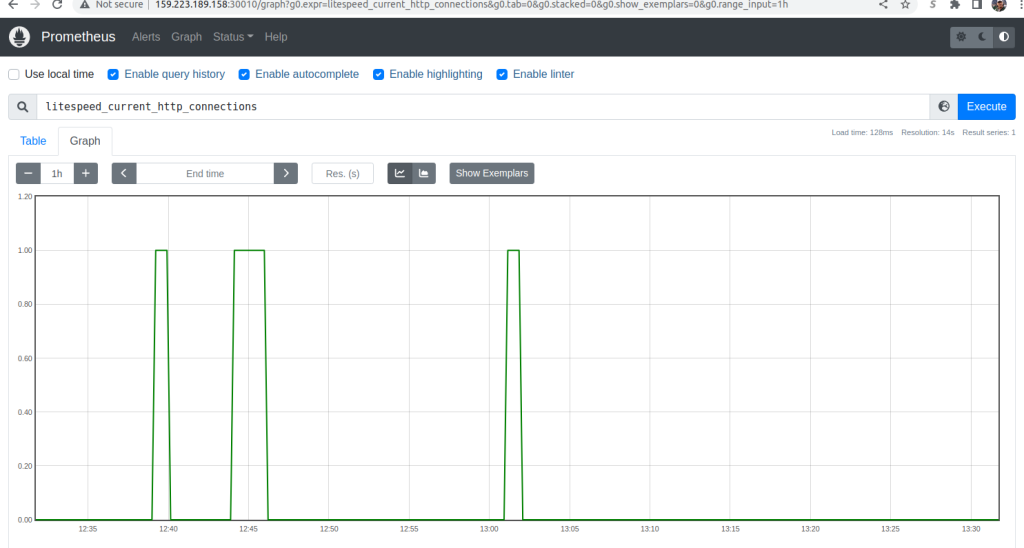
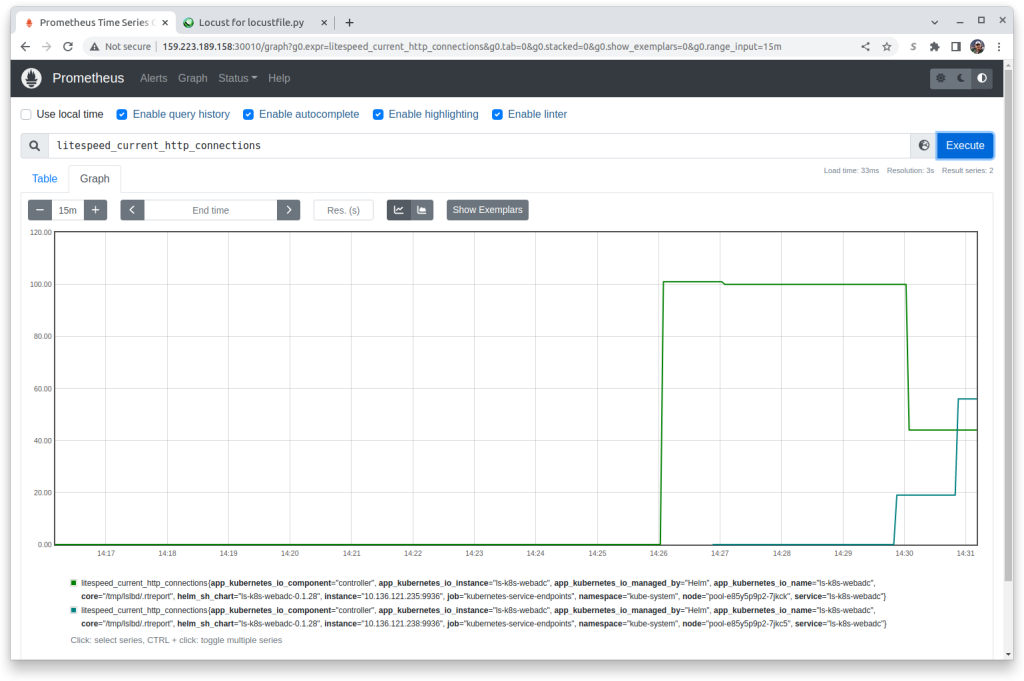
    To keep an eye on the LiteSpeed Ingress Controller, enter into the search bar litespeed_current_http_connections, press the Execute button and the Graph tab and you should see any http traffic on your cluster. There may be some random traffic:


    Monitoring LiteSpeed Ingress Controller

    If you do not see a graph, you may need to verify that you used the correct helm parameters when you [installed the LiteSpeed Ingress Controller](#Installing the LiteSpeed Ingress Controller) and check the Troubleshooting documentation.

    Installing a load generator

    To simulate load, install Locust. Using your text editor create the file 2-locust.yaml using the following contents:

    apiVersion: v1 
    kind: ConfigMap 
    metadata: 
      name: locust-script 
    data: 
      locustfile.py: |- 
        from locust import HttpUser, task, between 
    
        class QuickstartUser(HttpUser): 
            wait_time = between(0.7, 1.3) 
    
            @task 
            def hello_world(self): 
                self.client.get("/", headers={"Host": "example.com"}) 
    --- 
    apiVersion: apps/v1 
    kind: Deployment 
    metadata: 
      name: locust 
    spec: 
      selector: 
        matchLabels: 
          app: locust 
      template: 
        metadata: 
          labels: 
            app: locust 
        spec: 
          containers: 
            - name: locust 
              image: locustio/locust 
              ports: 
                - containerPort: 8089 
              volumeMounts: 
                - mountPath: /home/locust 
                  name: locust-script 
          volumes: 
            - name: locust-script 
              configMap: 
                name: locust-script 
    --- 
    apiVersion: v1 
    kind: Service 
    metadata: 
      name: locust 
    spec: 
      ports: 
        - port: 8089 
          targetPort: 8089 
          nodePort: 30015 
      selector: 
        app: locust 
      type: NodePort
    

    Deploy Locust:

    $ kubectl apply -f  2-locust.yaml 

    Accessing Locust

    To then access Locust from a web browser, use the trick above:

    $ kubectl get pods -o=wide|grep locust

    In my environment, it returned a single line:

    locust-7885f7b458-hvchm                           1/1     Running   0          23h     10.244.3.30      pool-e85y5p9p2-7jkc5   <none>           <none>
    

    In column 7, it reports the node that it was run in; for me that is pool-e85y5p9p2-7jkc5. Remember that name. Then get the list of external IP addresses for your nodes:

    $ kubectl get nodes -o=wide

    Which displays on my system:

    NAME                   STATUS   ROLES    AGE   VERSION    INTERNAL-IP      EXTERNAL-IP       OS-IMAGE                       KERNEL-VERSION          CONTAINER-RUNTIME
    pool-e85y5p9p2-7jkc5   Ready    <none>   5d    v1.21.14   10.136.121.238   159.223.189.158   Debian GNU/Linux 10 (buster)   5.10.0-0.bpo.15-amd64   containerd://1.4.13
    pool-e85y5p9p2-7jkck   Ready    <none>   5d    v1.21.14   10.136.121.235   147.182.135.113   Debian GNU/Linux 10 (buster)   5.10.0-0.bpo.15-amd64   containerd://1.4.13
    pool-e85y5p9p2-7jkcs   Ready    <none>   5d    v1.21.14   10.136.121.237   137.184.105.17    Debian GNU/Linux 10 (buster)   5.10.0-0.bpo.15-amd64   containerd://1.4.13
    

    And I can see that the pool pool-e85y5p9p2-7jkc5 has external IP address of 159.223.189.158. Since the yaml exports the application on port 30015 on that IP, you can bring up a browser and enter in the url: http://[YOUR IP ADDRESS]:30015, which for me is: http://159.223.189.158:30015:

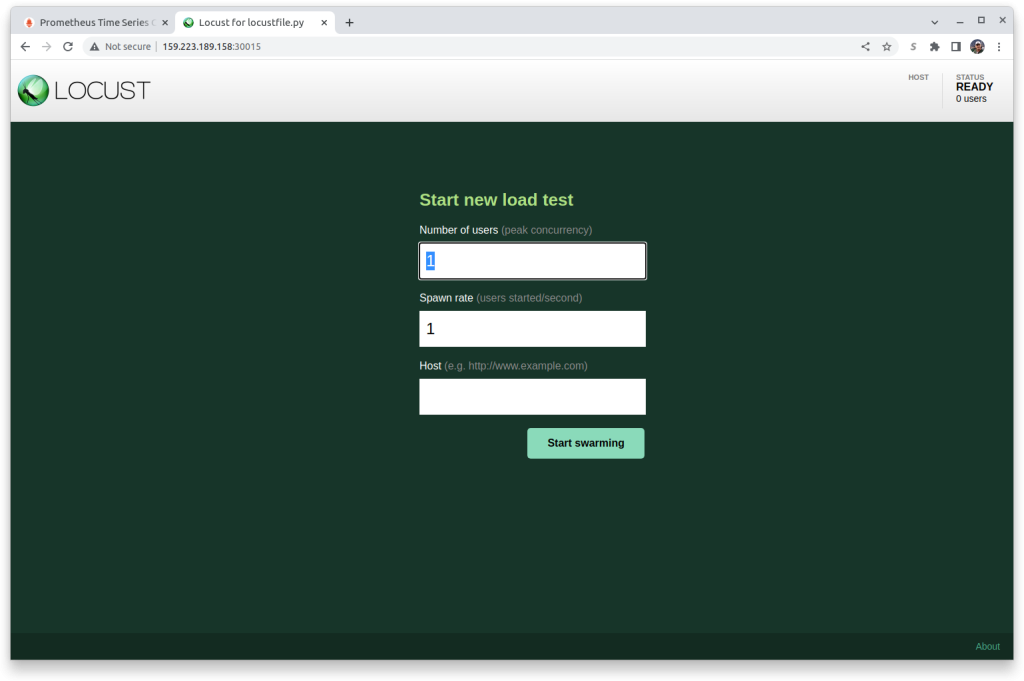
    Locust Entry

    LiteSpeed’s IP Address

    To be able to put load on LiteSpeed, you’ll need to know its exported IP address. Get the list of all exported services.

    $ kubectl get svc -A

    Which for me returns:

    NAMESPACE        NAME                             TYPE           CLUSTER-IP       EXTERNAL-IP       PORT(S)                      AGE
    cert-manager     cert-manager                     ClusterIP      10.245.152.216   <none>            9402/TCP                     323d
    cert-manager     cert-manager-webhook             ClusterIP      10.245.60.0      <none>            443/TCP                      323d
    default          kubernetes                       ClusterIP      10.245.0.1       <none>            443/TCP                      340d
    gateway-system   gateway-api-admission-server     ClusterIP      10.245.91.141    <none>            443/TCP                      43d
    kube-system      dashboard-kubernetes-dashboard   ClusterIP      10.245.7.158     <none>            443/TCP                      339d
    kube-system      external-dns                     ClusterIP      10.245.107.183   <none>            7979/TCP                     9d
    kube-system      kube-dns                         ClusterIP      10.245.0.10      <none>            53/UDP,53/TCP,9153/TCP       340d
    kube-system      locust                           NodePort       10.245.43.158    <none>            8089:30015/TCP               3m31s
    kube-system      ls-k8s-webadc                    LoadBalancer   10.245.28.197    157.230.201.138   80:31743/TCP,443:30932/TCP   20h
    kube-system      metrics-server                   ClusterIP      10.245.83.231    <none>            443/TCP                      41h
    kube-system      podinfo                          NodePort       10.245.197.197   <none>            80:30001/TCP                 44h
    kube-system      prometheus-alertmanager          ClusterIP      10.245.0.72      <none>            80/TCP                       42h
    kube-system      prometheus-kube-state-metrics    ClusterIP      10.245.222.254   <none>            8080/TCP                     42h
    kube-system      prometheus-node-exporter         ClusterIP      10.245.200.251   <none>            9100/TCP                     42h
    kube-system      prometheus-pushgateway           ClusterIP      10.245.35.25     <none>            9091/TCP                     42h
    kube-system      prometheus-server                NodePort       10.245.254.164   <none>            80:30010/TCP                 42h
    

    Look at the NAME column and look for the name ls-k8s-webadc. In that row should be an EXTERNAL-IP address. That will be the address we will be putting load on. In my case it is 157.230.201.138

    Simulating Load

    Enter the following values in the Locust Start new load test panel:

    • Number of users: 100
    • Spawn rate: 10
    • Host: http://[YOUR IP ADDRESS] which for me would be http://157.230.201.138
      to
      …and press the Start swarming button.

    Monitoring Results

    Go back into Prometheus in your browser. You may need to press the Execute button several times and the + or - buttons to adjust the update frequency, and it may take up to 5 minutes for the results to show, but soon you’ll see a single line change into two or more lines.

    Prometheus Loaded

    You can also see the results from the Hotizontal Pod Autoscaler:

    $ kubectl describe hpa
    Name:                                                  ls-k8s-webadc
    Namespace:                                             kube-system
    Labels:                                                app.kubernetes.io/component=controller
                                                           app.kubernetes.io/instance=ls-k8s-webadc
                                                           app.kubernetes.io/managed-by=Helm
                                                           app.kubernetes.io/name=ls-k8s-webadc
                                                           helm.sh/chart=ls-k8s-webadc-0.1.28
    Annotations:                                           meta.helm.sh/release-name: ls-k8s-webadc
                                                           meta.helm.sh/release-namespace: kube-system
    CreationTimestamp:                                     Thu, 15 Sep 2022 13:31:46 -0400
    Reference:                                             Deployment/ls-k8s-webadc
    Metrics:                                               ( current / target )
      resource cpu on pods  (as a percentage of request):  70% (140m) / 50%
    Min replicas:                                          1
    Max replicas:                                          11
    Deployment pods:                                       5 current / 5 desired
    Conditions:
      Type            Status  Reason              Message
      ----            ------  ------              -------
      AbleToScale     True    ReadyForNewScale    recommended size matches current size
      ScalingActive   True    ValidMetricFound    the HPA was able to successfully calculate a replica count from cpu resource utilization (percentage of request)
      ScalingLimited  False   DesiredWithinRange  the desired count is within the acceptable range
    Events:
      Type    Reason             Age                  From                       Message
      ----    ------             ----                 ----                       -------
      Normal  SuccessfulRescale  11m (x2 over 20h)    horizontal-pod-autoscaler  New size: 2; reason: cpu resource utilization (percentage of request) above target
      Normal  SuccessfulRescale  7m33s (x2 over 20h)  horizontal-pod-autoscaler  New size: 3; reason: cpu resource utilization (percentage of request) above target
      Normal  SuccessfulRescale  7m18s (x2 over 20h)  horizontal-pod-autoscaler  New size: 4; reason: cpu resource utilization (percentage of request) above target
      Normal  SuccessfulRescale  2m2s (x2 over 20h)   horizontal-pod-autoscaler  New size: 5; reason: cpu resource utilization (percentage of request) above target
    

    In my case it wanted to increase the number of pods quite high, but was limited in resources to do so:

    $ kubectl get pods -A | grep ls-k8s-webadc-
    kube-system      ls-k8s-webadc-66d78d6755-6nw5w                    1/1     Running   0          11m
    kube-system      ls-k8s-webadc-66d78d6755-j9mmt                    0/1     Pending   0          5m29s
    kube-system      ls-k8s-webadc-66d78d6755-nmfkc                    1/1     Running   0          21h
    kube-system      ls-k8s-webadc-66d78d6755-q8fnj                    1/1     Running   0          15m
    kube-system      ls-k8s-webadc-66d78d6755-xp944                    0/1     Pending   0          10m
    

    Note that the status is Pending on a lot of the pods. A detailed description of one of the pending pods will show:

    $ kubectl describe pod ls-k8s-webadc-66d78d6755-xp944
    Name:           ls-k8s-webadc-66d78d6755-xp944
    Namespace:      kube-system
    Priority:       0
    Node:           <none>
    Labels:         app.kubernetes.io/component=controller
                    app.kubernetes.io/instance=ls-k8s-webadc
                    app.kubernetes.io/managed-by=Helm
                    app.kubernetes.io/name=ls-k8s-webadc
                    helm.sh/chart=ls-k8s-webadc-0.1.28
                    pod-template-hash=66d78d6755
    Annotations:    <none>
    Status:         Pending
    IP:             
    IPs:            <none>
    Controlled By:  ReplicaSet/ls-k8s-webadc-66d78d6755
    Containers:
      controller:
        Image:       docker.io/litespeedtech/ls-k8-staging:latest
        Ports:       80/TCP, 443/TCP
        Host Ports:  80/TCP, 443/TCP
        Args:
          /ls-k8s-up.sh
          --v=4
          --allow-internal-ip=true
          --healthz-port=11972
          --lslb-debug=false
          --lslb-enable-ocsp-stapling=false
          --lslb-http-port=80
          --lslb-https-port=443
          --enable-metrics=true
          --metrics-service-port=0
        Limits:
          cpu:  200m
        Requests:
          cpu:      200m
        Liveness:   http-get http://:11972/healthz delay=60s timeout=30s period=30s #success=1 #failure=3
        Readiness:  http-get http://:11972/healthz delay=60s timeout=30s period=30s #success=1 #failure=3
        Environment:
          POD_NAME:       ls-k8s-webadc-66d78d6755-xp944 (v1:metadata.name)
          POD_NAMESPACE:  kube-system (v1:metadata.namespace)
        Mounts:
          /var/run/secrets/kubernetes.io/serviceaccount from kube-api-access-nwspm (ro)
    Conditions:
      Type           Status
      PodScheduled   False 
    Volumes:
      kube-api-access-nwspm:
        Type:                    Projected (a volume that contains injected data from multiple sources)
        TokenExpirationSeconds:  3607
        ConfigMapName:           kube-root-ca.crt
        ConfigMapOptional:       <nil>
        DownwardAPI:             true
    QoS Class:                   Burstable
    Node-Selectors:              <none>
    Tolerations:                 node.kubernetes.io/not-ready:NoExecute op=Exists for 300s
                                 node.kubernetes.io/unreachable:NoExecute op=Exists for 300s
    Events:
      Type     Reason             Age                  From                Message
      ----     ------             ----                 ----                -------
      Normal   NotTriggerScaleUp  2m6s (x11 over 12m)  cluster-autoscaler  pod didn't trigger scale-up:
      Warning  FailedScheduling   55s (x14 over 13m)   default-scheduler   0/3 nodes are available: 3 node(s) didn't have free ports for the requested pod ports.
    

    The warning message at the bottom basically said that it was unable to scale the pod because there was not a free node to schedule it on. If there was, Prometheus would show additional lines. This is normal and expected.

    Removing Load

    When you remove load, the number of pods should be reduced. In the Locust browser screen press the Stop button. In Prometheus you’ll be able to see the load decrease. However, the number of pods will not go down for a while. To smooth the impact of scaling down, there is typically 5 minutes of reduced load per pod before it begins to scale down. This may mean up to 25 minutes before the number of pods is back to 1. You can watch the process with:

    $ kubectl describe hpa
    Name:                                                  ls-k8s-webadc
    Namespace:                                             kube-system
    Labels:                                                app.kubernetes.io/component=controller
                                                           app.kubernetes.io/instance=ls-k8s-webadc
                                                           app.kubernetes.io/managed-by=Helm
                                                           app.kubernetes.io/name=ls-k8s-webadc
                                                           helm.sh/chart=ls-k8s-webadc-0.1.28
    Annotations:                                           meta.helm.sh/release-name: ls-k8s-webadc
                                                           meta.helm.sh/release-namespace: kube-system
    CreationTimestamp:                                     Thu, 15 Sep 2022 13:31:46 -0400
    Reference:                                             Deployment/ls-k8s-webadc
    Metrics:                                               ( current / target )
      resource cpu on pods  (as a percentage of request):  4% (8m) / 50%
    Min replicas:                                          1
    Max replicas:                                          11
    Deployment pods:                                       1 current / 1 desired
    Conditions:
      Type            Status  Reason              Message
      ----            ------  ------              -------
      AbleToScale     True    ReadyForNewScale    recommended size matches current size
      ScalingActive   True    ValidMetricFound    the HPA was able to successfully calculate a replica count from cpu resource utilization (percentage of request)
      ScalingLimited  False   DesiredWithinRange  the desired count is within the acceptable range
    Events:
      Type    Reason             Age                  From                       Message
      ----    ------             ----                 ----                       -------
      Normal  SuccessfulRescale  29m (x2 over 20h)    horizontal-pod-autoscaler  New size: 2; reason: cpu resource utilization (percentage of request) above target
      Normal  SuccessfulRescale  25m (x2 over 20h)    horizontal-pod-autoscaler  New size: 3; reason: cpu resource utilization (percentage of request) above target
      Normal  SuccessfulRescale  24m (x2 over 20h)    horizontal-pod-autoscaler  New size: 4; reason: cpu resource utilization (percentage of request) above target
      Normal  SuccessfulRescale  19m (x2 over 20h)    horizontal-pod-autoscaler  New size: 5; reason: cpu resource utilization (percentage of request) above target
      Normal  SuccessfulRescale  2m59s (x2 over 20h)  horizontal-pod-autoscaler  New size: 1; reason: All metrics below target
    

    Cleaning Up

    You will want to remove the exposed services and pods, perhaps keeping Prometheus and the LiteSpeed Ingress Controller.

    To remove locust

    $ kubectl delete -f 2-locust.yaml

    To remove the simple application:

    $ kubectl delete -f 1-podinfo.yaml

    If you wish to remove Prometheus:

    $ helm delete prometheus

    If you wish to remove the LiteSpeed Ingress Controller:

    $ helm delete ls-k8s-webadc

    Fullfilling the Promise

    LiteSpeed’s WebADC Load Balancer already has a number of tools to scale to meet demand including:

    • Smart Botnet Detection
    • WordPress Protection from WordPress brute force attacks
    • Server-level reCAPTCHA
    • Multiple load balancing techniques
    • …and more…

    Taking advantage of the Kubernetes AutoScaler combined with its independent, stateless mode of operation allows your organization to expose the full value of all of the services that you’ve worked so hard to build.

  • WordPress, WooCommerce, and Kubernetes with LiteSpeed Ingress Controller

    WordPress, WooCommerce, and Kubernetes with LiteSpeed Ingress Controller

    WordPress, WooCommerce, and Kubernetes with LiteSpeed Ingress Controller

    In this post, you will learn to deploy WordPress, WooCommerce, and Kubernetes with LiteSpeed Ingress Controller. We’ll install the LiteSpeed Cache plugin, and load balance your environment using the LiteSpeed Ingress Controller. This real-world example, in a DigitalOcean environment, will use Kubernetes cert-manager to manage your certificate.

    Preparation

    This blog assumes little prior experience with Kubernetes, but does expect you to have kubectl and helm installed. You should have access to your cluster available to the console user and familiarity with text editing

    We’ll be using Digital Ocean for the example environment.

    • You will need kubectl working in your environment. See here for complete instructions.
    • You will need the LiteSpeed Ingress Controller installed and operational. See here for complete instructions. You can skip the Making HTTPS Work step for now as we will be doing that later.
    • You will need cert-manager installed and operational. See here for complete instructions. Perform the steps up to and including Creating a ClusterIssuer. The steps below that will define the Ingress.
    • You will need a real domain name that is available on the internet, and you will need to configure your environment to publish it. For Digital Ocean this is published using ExternalDNS described here.

    Create some sample definitions

    In addition to the previously mentioned preparation, we recommend the following sample definitions for simplicity:

    • Create a namespace to deploy the pod/service/ingress into. Our sample uses the namespace woo. Note that if you change this you will need to change the YAML file’s namespace parameter to match the changed name:
    kubectl create ns woo
    

    Create a number of secrets to hold some useful definitions. You can change these and just note to change their YAML references below:

    • The database name which we’ll name multitenant-wp
    • The admin database password which we’ll name mysqlpwd
    • The database user which we’ll name userwp
    • The database user password which we’ll name pwdwp
    kubectl create -n woo secret generic mysql-database --from-literal=database=multitenant_wp
    kubectl create -n woo secret generic mysql-password --from-literal=password=mysqlpwd
    kubectl create -n woo secret generic mysql-user --from-literal=username=userwp
    kubectl create -n woo secret generic mysql-user-password --from-literal=password=pwdwp
    

    Create the persistent volumes

    You will need persistent volume definitions. To create them use the text editor of your choice and create the file named 1-pv.yaml:

    apiVersion: v1
    kind: PersistentVolume
    metadata:
      name: mysql-pv
      namespace: woo
    spec:
      storageClassName: do-block-storage
      capacity:
        storage: 20Gi
      accessModes:
        - ReadWriteOnce
      hostPath:
        path: "/var/lib/mysql"
    ---
    apiVersion: v1
    kind: PersistentVolumeClaim
    metadata:
      name: mysql-pv-claim
      namespace: woo
    spec:
      storageClassName: do-block-storage
      accessModes:
        - ReadWriteOnce
      resources:
        requests:
          storage: 20Gi
    ---
    apiVersion: v1
    kind: PersistentVolume
    metadata:
      name: wordpress-pv
      namespace: woo
    spec:
      storageClassName: do-block-storage
      capacity: 
        storage: 30Gi
      accessModes:
        - ReadWriteOnce
      hostPath:
        path: "/var/www"
    ---
    apiVersion: v1
    kind: PersistentVolumeClaim
    metadata:
      name: wordpress-pv-claim
      namespace: woo
    spec:
      storageClassName: do-block-storage
      accessModes:
        - ReadWriteOnce
      resources:
        requests:
          storage: 30Gi
    ---
    

    If you changed your namespace you’ll need to update the namespace definitions above.
    To create the volumes, apply the 1-pv.yaml file:

    kubectl apply -f 1-pv.yaml
    

    Install MySQL for WordPress

    To install WordPress, you’ll need to install MySQL first and use the persistent volumes you created above. Create the file named: 2-mysql.yaml:

    apiVersion: v1
    kind: Service
    metadata: 
      name: mysql-wp
      namespace: woo
    spec:
      ports:
        - port: 3306
      selector:
        app: wordpress
        tier: mysql
    ---
    apiVersion: apps/v1
    kind: Deployment
    metadata:
      name: mysql-wp
      namespace: woo
    spec:
      selector:
        matchLabels:
          app: wordpress
          tier: mysql
      strategy:
        type: Recreate
      template:
        metadata:
          labels:
            app: wordpress
            tier: mysql
        spec:
          containers:
          - image: mysql:latest
            name: mysql
            env:
            - name: MYSQL_ROOT_PASSWORD
              valueFrom:
                secretKeyRef:
                  name: mysql-password
                  key: password
            - name: MYSQL_USER
              valueFrom:
                secretKeyRef:
                  name: mysql-user
                  key: username
            - name: MYSQL_PASSWORD
              valueFrom:
                secretKeyRef:
                  name: mysql-user-password
                  key: password
            - name: MYSQL_DATABASE
              valueFrom:
                secretKeyRef:
                  name: mysql-database
                  key: database
            ports:
            - containerPort: 3306
              name: mysql
            volumeMounts:
            - name: persistent-storage
              mountPath: /var/lib/mysql
          volumes:
          - name: persistent-storage
            persistentVolumeClaim:
              claimName: mysql-pv-claim
    ---
    

    If you changed the namespace or the MySQL user or passwords secret titles you’ll need to update the definitions above.

    To install MySQL apply the 2-mysql.yaml file:

    kubectl apply -f 2-mysql.yaml
    

    Install WordPress

    To install WordPress itself, create the file named 3-wordpress.yaml:

    apiVersion: v1
    kind: Service
    metadata: 
      name: wordpress
      namespace: woo
    spec:
      ports:
        - port: 80
      selector:
        app: wordpress
        tier: web
    ---
    apiVersion: apps/v1
    kind: Deployment
    metadata:
      name: wordpress
      namespace: woo
    spec:
      selector:
        matchLabels:
          app: wordpress
          tier: web
      strategy:
        type: Recreate
      template:
        metadata:
          labels:
            app: wordpress
            tier: web
        spec:
          containers:
          - image: wordpress:php8.1-apache
            name: wordpress
            env:
            - name: WORDPRESS_DB_HOST
              value: mysql-wp:3306
            - name: WORDPRESS_DB_PASSWORD
              valueFrom:
                secretKeyRef:
                  name: mysql-user-password
                  key: password
            - name: WORDPRESS_DB_USER
              valueFrom:
                secretKeyRef:
                  name: mysql-user
                  key: username
            - name: WORDPRESS_DB_NAME
              valueFrom:
                secretKeyRef:
                  name: mysql-database
                  key: database
            ports:
            - containerPort: 80
              name: wordpress
            volumeMounts:
            - name: persistent-storage
              mountPath: /var/www/html
          volumes:
          - name: persistent-storage
            persistentVolumeClaim:
              claimName: wordpress-pv-claim
    

    If you changed the namespace or the MySQL user or passwords secret titles you’ll need to update the definitions above.

    To install WordPress apply the 3.mysql.yaml file:

    kubectl apply -f 3-wordpress.yaml
    

    Expose WordPress

    Once you install WordPress you’ll want to make it available to the internet, and you do that with a Kubernetes Ingress definition. We strongly recommend that you use a real internet DNS name for your environment. This will let you use Let’s Encrypt as described in LiteSpeed’s Using Cert-manager documentation, and access it via the DNS name.

    To create the Ingress, you’ll need to have created the DNS name, which is typically done by purchasing the DNS name from a vendor. After it’s available, replace the reference to YOUR DNS NAME with the actual DNS name in the example below, and save as the file 4-ingress.yaml:

    apiVersion: networking.k8s.io/v1
    kind: Ingress
    metadata:
      name: wordpress
      namespace: woo
      annotations:
        kubernetes.io/ingress.class: litespeedtech.com/lslbd
        cert-manager.io/cluster-issuer: letsencrypt-production
    spec:
      rules:
      - host: YOUR DNS NAME
        http:
         paths:
         - path: "/"
           pathType: Prefix
           backend:
             service:
               name: wordpress
               port:
                 number: 80
      tls:
      - hosts:
        - YOUR DNS NAME
        secretName: YOUR DNS NAME
    

    To install it:

    kubectl apply -f 4-ingress.yaml
    

    You know if you have everything right if you can go to your website via http://YOUR_DNS_NAME/

    Configure WordPress

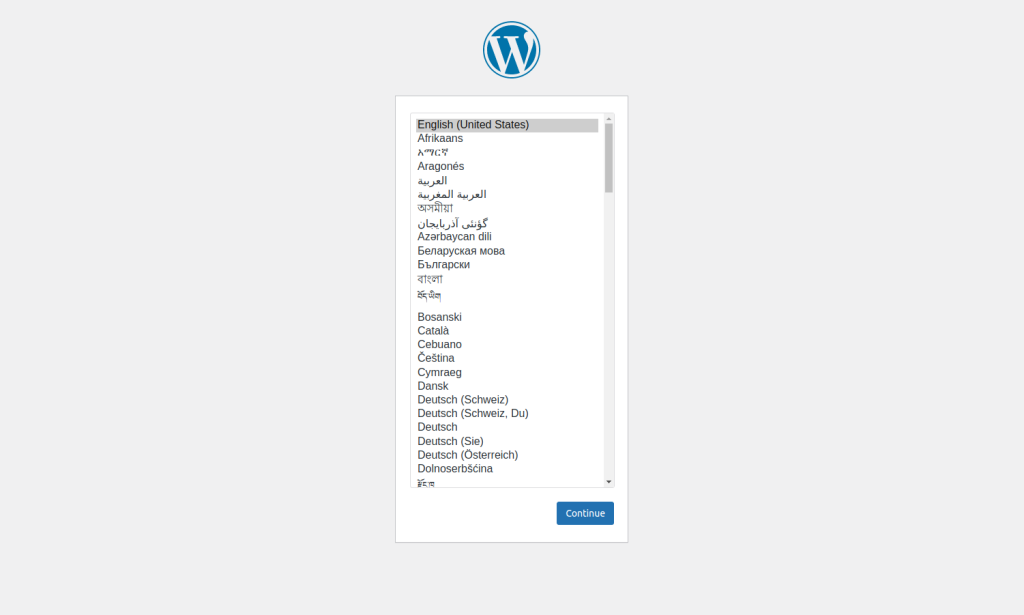
    When you go to your website you will see the WordPress initial screen prompting you for your language:

    WordPress Language

    Select your language and press Continue:

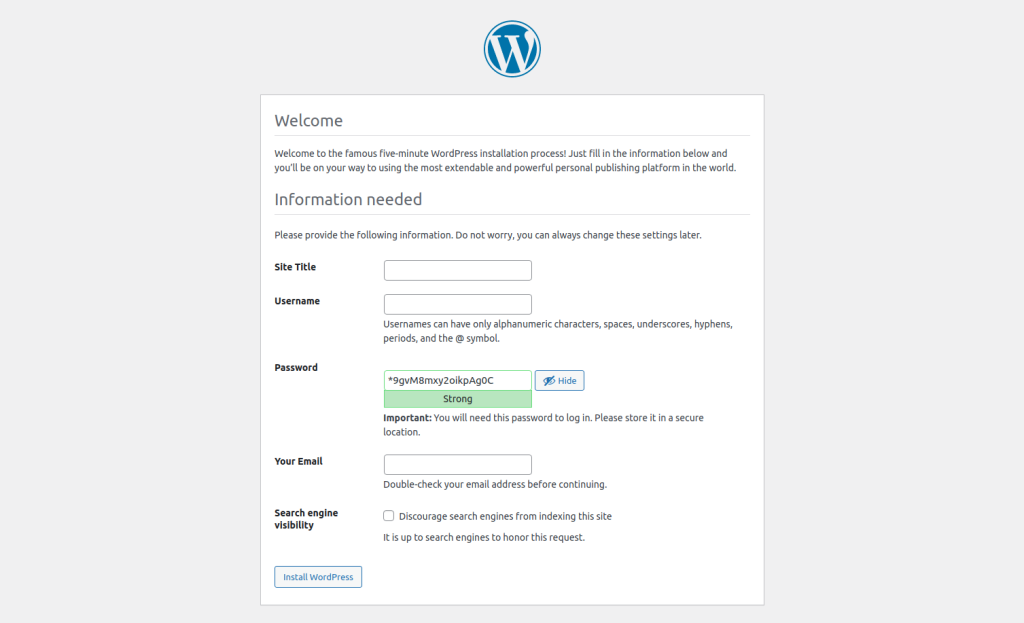
    WordPress Configuration

    Fill in the required fields and press Install WordPress. You should get a message indicating that it was successfully installed, and you will be asked to login using the credentials you just entered. Reenter the credentials and enter WordPress.

    Install LiteSpeed Cache

    To install the LiteSpeed Cache plugin follow the instructions here

    Install WooCommerce

    To install the WooCommerce plugIn follow the instructions here

    You can now configure WooCommerce with the needs of your store in mind.

    You have a store

    While there is still a bit of work to do in populating your store, the framework for the store is now complete. It is accessible via HTTPS. It is extremely extensible:

    • By using Kubernetes now, you can add other applications, stores, web sites and more by adding more deployment/services/ingresses.
    • Kubernetes Ingress lets you use the same HTTPS definition with different directory names to reference different backends, allowing you to have documention backends, additional stores, third-party sellers and more.
    • Because you used cert-manager, your HTTPS certificate will be kept up to date automatically.
    • If you have performance issues, there are metrics that can be used to help you identify bottlenecks. If the load balancer needs to be scaled, it’s easy to do.
    • Kubernetes will monitor the health of all deployed applications. If something goes down it’s automatically restarted.

    Deleting everything and putting it all back

    If you need to delete everything to start over or simply to clean it up after testing, you should delete the entities in the reverse order you created them:

    kubectl delete -f 4-ingress.yaml
    kubectl delete -f 3-wordpress.yaml
    kubectl delete -f 2-mssql.yaml
    kubectl delete -f 1-pv.yaml
    

    Delete the secrets:

    kubectl delete -n woo secret mysql-database
    kubectl delete -n woo secret mysql-password
    kubectl delete -n woo secret mysql-user
    kubectl delete -n woo secret mysql-user-password
    

    We do not recommend that you delete the namespace as it may enter a Terminating condition it may not be able to get out of.

    What a way to start!

    When you need a production quality store, Kubernetes with the LiteSpeed Ingress Controller gives you the full power of all of the tools you need to get going.