Tag: cpanel

  • Security Update for LiteSpeed cPanel Plugin

    Security Update for LiteSpeed cPanel Plugin

    LiteSpeed cPanel Plugin Vulnerability

    We have another urgent security update for LiteSpeed’s user-end plugin for cPanel.

    Last night we were made aware of a vulnerability affecting our user-end cPanel plugin (LiteSpeed’s WHM plugin was not affected). We patched this vulnerability in v2.4.8.

    Please update to the latest version of the cPanel user-end plugin, which is bundled with the WHM plugin..

    This Privilege Escalation vulnerability, which was reported to us by the team at Namecheap, has been assigned CVE-2026-54420.

    Impact

    A vulnerability in the LiteSpeed cPanel plugin allows a user with FTP or web shell access to escalate privileges to root on shared hosting servers running CloudLinux/CageFS.

    This vulnerability is being actively exploited, and poses a risk for all user-end plugin versions prior to 2.4.8.

    Use the following command to determine if your server has been affected:

    grep -rE 'cpanel_jsonapi_func=(generateEcCert|packageUserSize)|cert_action_entry .*geneccert' /usr/local/cpanel/logs/ /var/cpanel/logs/ 2>/dev/null
    

    If there is no output, then your server has not been affected.

    If this command results in any output, the vulnerability may have been exploited on your server. There can be false positives, so look for the following to confirm:

    1. Pairing: generateEcCert immediately followed by packageUserSize for the same user (legitimate UI flows don’t chain these)
    2. Concurrency: 7–10 concurrent calls per attempt (legitimate UI does one at a time)
    3. Same source IP hammering both endpoints

    To determine any damage done, examine the system logs for any actions taken by the detected IPs. If you need assistance, you may contact our support team.

    Actions

    We urgently recommend that those using the LiteSpeed user-end plugin for cPanel upgrade to LiteSpeed WHM Plugin v5.3.2.1 (bundled w/ cPanel plugin v2.4.8) or higher to patch this vulnerability.

    To update the WHM plugin, run this command, which will also update the user-end plugin, if you currently have it installed:

    wget -O- https://litespeedtech.com/packages/cpanel/lsws_whm_plugin_install.sh | sh
    

    If you cannot upgrade at this time, you can use the following command to remove the user-end plugin and avoid this vulnerability:

    /usr/local/lsws/admin/misc/lscmctl cpanelplugin --uninstall

    Once you’ve updated the WHM plugin, you can run the following commands, which will reinstall the user-end plugin and turn on autoinstall:

    /usr/local/lsws/admin/misc/lscmctl cpanelplugin --install
    /usr/local/lsws/admin/misc/lscmctl cpanelplugin -autoinstall 1
    

    Timeline

    • May 31, 2026: We were alerted to the original issue.
    • May 31, 2026: cPanel pushed an uninstall command for the user-end plugin
    • Jun 1, 2026: We released cPanel plugin v2.4.8 and WHM plugin v5.3.2.1
    • Jun 1, 2026: We applied for a CVE
    • Jun 14, 2026: CVE-2026-54420 was assigned

    Conclusion

    We thank Namecheap for bringing the original issue to our attention. We’d also like to thank the cPanel team for their immediate action in preventing further exploitation on additional servers. The vulnerability has been patched, so if you are keeping your cPanel plugin up-to-date, there is nothing you need to do. If you have not updated in a while, please do so immediately.

  • Security Update for LiteSpeed cPanel Plugin

    Security Update for LiteSpeed cPanel Plugin

    LiteSpeed cPanel Plugin Vulnerability

    We have an urgent security update for LiteSpeed’s user-end plugin for cPanel.

    This week we were made aware of a vulnerability affecting our user-end cPanel plugin (LiteSpeed’s WHM plugin was not affected). We patched this vulnerability in v2.4.5.

    Please update to the latest version of the cPanel user-end plugin, which is bundled with the WHM plugin..

    This Privilege Escalation vulnerability, which was reported to us by David Strydom has been assigned CVE-2026-48172.

    Impact

    Any cPanel user (including an attacker or a compromised account) may exploit the lsws.redisAble function to execute arbitrary scripts as root.

    This vulnerability is being actively exploited, and poses a risk for all user-end plugin versions between v2.3 and v2.4.4.

    Use the following command to determine if your server has been affected:

    grep -rE "cpanel_jsonapi_func=redisAble" /var/cpanel/logs /usr/local/cpanel/logs/ 2>/dev/null
    

    If there is no output, then your server has not been affected.

    If this command results in any output, we recommend you examine the IPs in the list, determine if they are valid, and if not, block them. To determine any damage done, examine the system logs for any actions taken by the detected IPs. If you need assistance, you may contact our support team.

    Actions

    We urgently recommend that those using the LiteSpeed user-end plugin for cPanel upgrade to LiteSpeed WHM Plugin v5.3.1.0 (bundled w/ cPanel plugin v2.4.7) or higher to patch this vulnerability.

    If you cannot upgrade at this time, you can use the following command to remove the user-end plugin and avoid this vulnerability:

    /usr/local/lsws/admin/misc/lscmctl cpanelplugin --uninstall
    

    Additional Vulnerabilities

    After addressing the initial report, we undertook a full security review of our cPanel and WHM plugins

    As a result, we have patched additional potential attack vectors in both plugins and released cPanel plugin v2.4.7 bundled with WHM plugin v5.3.1.0.

    To be clear, there have been no reports of these additional vulnerabilities being exploited. This was a proactive review, undertaken with the assistance of the cPanel/WebPros team.

    Timeline

    • May 19, 2026: We were alerted to the original issue.
    • May 19, 2026: cPanel pushed an uninstall command for the user-end plugin
    • May 19, 2026: We released cPanel plugin v2.4.6 and WHM plugin v5.3.0.0
    • May 20, 2026: We applied for a CVE
    • May 21, 2026: We completed a security review and released v2.4.7 and v5.3.1.0 of the plugins

    Conclusion

    We thank David Strydom for bringing the original issue to our attention. We’d also like to thank the cPanel team for their immediate action in preventing further exploitation on additional servers. All known vulnerabilities have been patched, so if you are keeping your cPanel plugin up-to-date, there is nothing you need to do. If you have not updated in a while, please do so immediately.

  • Proxy n8n with LiteSpeed Web Server

    Proxy n8n with LiteSpeed Web Server

    n8n with LiteSpeed Web Server

    If you are running cPanel with LiteSpeed Enterprise and want to deploy a modern automation service such as n8n, the setup can be both straightforward and reliable.

    In this article, we will walk through a basic example of running n8n inside Docker on a cPanel server, then publishing it through LiteSpeed Enterprise using reverse proxy rules that support both normal HTTP traffic and WebSocket connections.

    Set up n8n

    Below is a n8n example docker-compose.yml used for the n8n.example.com domain:

    version: "3.8"
    
    services:
      n8n:
        image: docker.n8n.io/n8nio/n8n:latest
        container_name: n8n
    
        ports:
          - "127.0.0.1:5678:5678"
    
        environment:
          - TZ= America/Los_Angeles
          - N8N_HOST=n8n.example.com
          - N8N_PROTOCOL=https
          - N8N_PROXY_HOPS=1
          - WEBHOOK_URL=https://n8n.example.com/
          - N8N_EDITOR_BASE_URL=https://n8n.example.com/
          - N8N_ENFORCE_SETTINGS_FILE_PERMISSIONS=true
          - N8N_RUNNERS_ENABLED=true
        volumes:
          - n8n_data:/home/node/.n8n
    
        restart: unless-stopped
    
    volumes:
      n8n_data:


    A few points are worth highlighting here:

    • N8N_HOST, N8N_PROTOCOL, WEBHOOK_URL, and N8N_EDITOR_BASE_URL help n8n understand that it is being served behind HTTPS on the public domain.
    • N8N_PROXY_HOPS=1 is important when n8n is behind a reverse proxy, because it helps n8n trust the forwarded request information correctly.

    Learn more about n8n environment variables.

    Proxy Setup

    To support both HTTP requests and WebSocket traffic, we used Apache-style userdata include files in cPanel.

    We added the following:

    <IfModule mod_rewrite.c> 
    RewriteEngine on 
    RewriteRule (.*) http://localhost:5678/\$1 [P,L] 
    ProxyPass / ws://localhost:5678/ 
    </IfModule>
    

    to /etc/apache2/conf.d/userdata/ssl/2_4/n8examplecom/proxy.conf for the SSL configuration and to /etc/apache2/conf.d/userdata/std/2_4/n8examplecom/proxy.conf for the non-SSL configuration.

    This configuration allows the domain to proxy regular traffic to the n8n container on localhost:5678, while also passing WebSocket connections correctly.

    Note: The backend target is always plain HTTP because SSL termination happens at the web-server level.

    After saving the include files, we rebuilt and reloaded the web server configuration, like so:

    /scripts/buildhttpdconf
    systemctl restart lsws
    

    Domain access

    Once DNS, SSL, Docker, and proxy rules are all in place, you can visit the public domain at https://n8n.example.com.

    From there, register your account on the n8n instance and begin building workflows.

    Set up simple test workflow

    To confirm that the reverse proxy and application are working properly, create a simple test workflow:

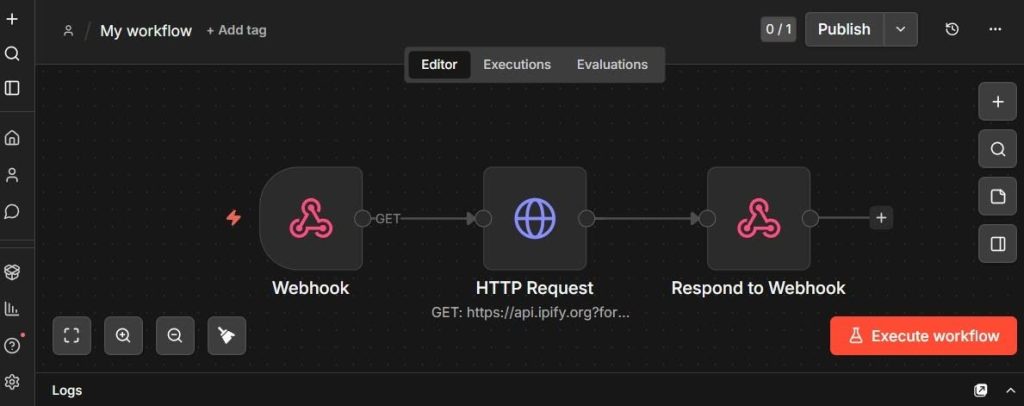
    1. Receive a webhook request
    2. Make an HTTP request to api.ipify.org
    3. Return the detected IP address as JSON

    Webhook node

    Use these two URLs:

    • Test URL: https://n8n.example.com/webhook-test/test-api
    • Production URL: https://n8n.example.com/webhook/test-api

    Set the webhook response mode to Using "Respond to Webhook" node.

    HTTP Request node

    Create an HTTP Request node with:

    • Method: GET
    • URL: https://api.ipify.org?format=json

    This endpoint returns a simple JSON response containing the requester IP address.

    Respond to Webhook node

    Set the following:

    • Respond With: JSON
    • Response Body (Expression):
      {  
      "myIP": "{{$json.ip}}"  
      }  
    

    n8n workflow
    The image above shows what the workflow looks like in the editor.

    Activate the workflow

    Activate the workflow to validate the webhook.

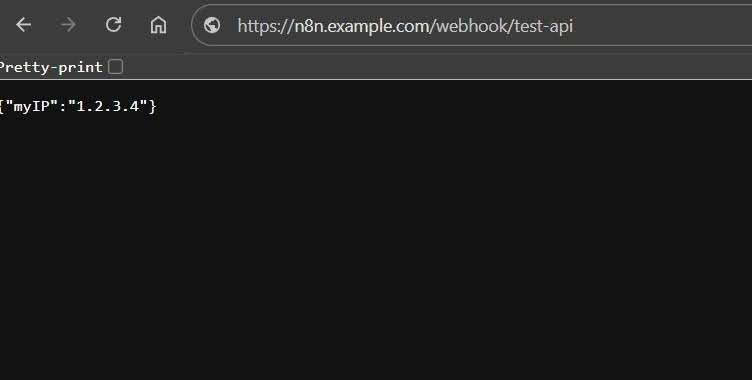
    n8n with LiteSpeed Web Server test output

    After activating the workflow, visiting the webhook URL in the browser should return a JSON response showing your IP address, like so:

    {"myIP": "192.0.2.0"}
    

    This is a simple but useful validation test, because it confirms:

    • the domain is reachable
    • HTTPS is working
    • the reverse proxy is forwarding requests correctly
    • n8n is processing the workflow
    • the response is being returned properly through LiteSpeed

    Conclusion

    Running n8n on cPanel with LiteSpeed Enterprise and Docker is practical. With the right proxy configuration, it is possible to support both standard HTTP traffic and WebSocket connections cleanly, while keeping the service accessible over HTTPS on its own domain.

    If you are looking for a clean way to publish n8n on a LiteSpeed Enterprise server, this is a solid approach.

  • Notes From the Road: cPanel Conference

    Notes From the Road: cPanel Conference

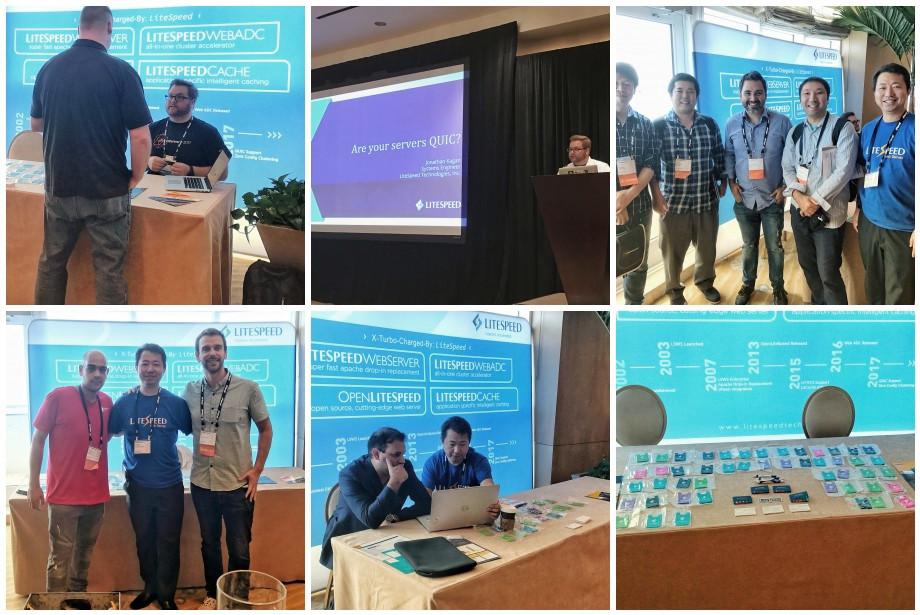
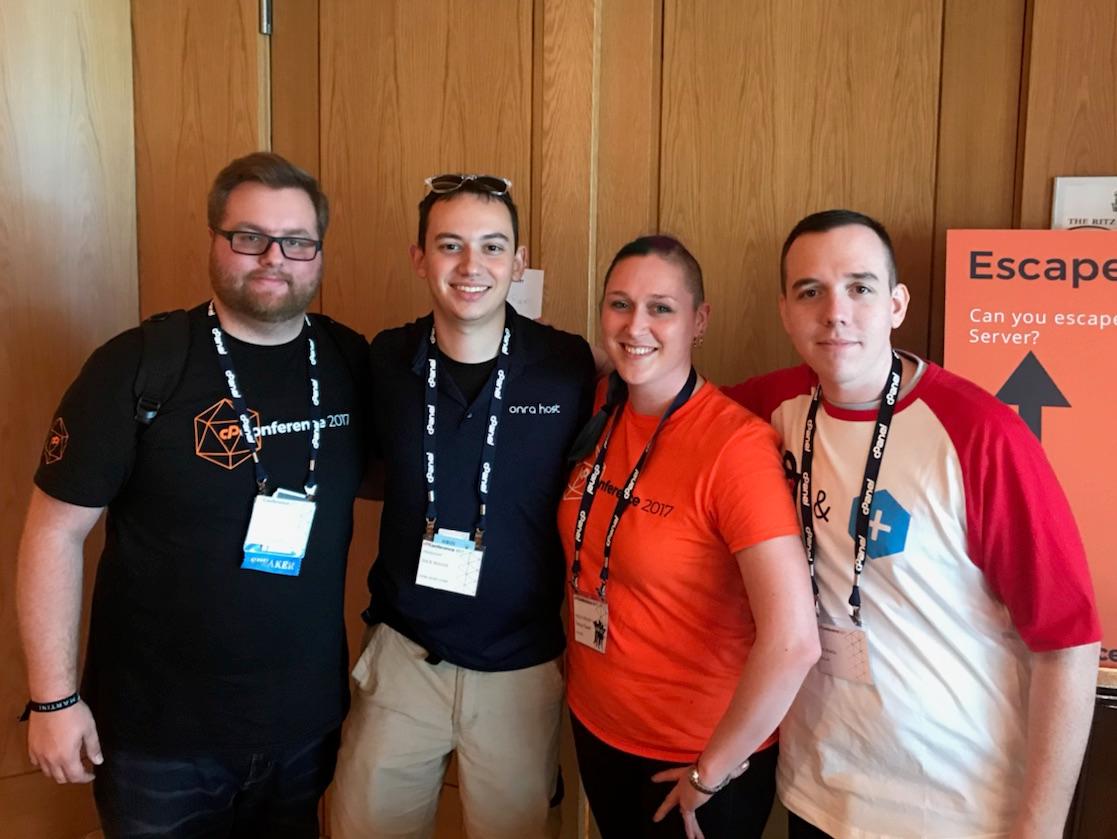
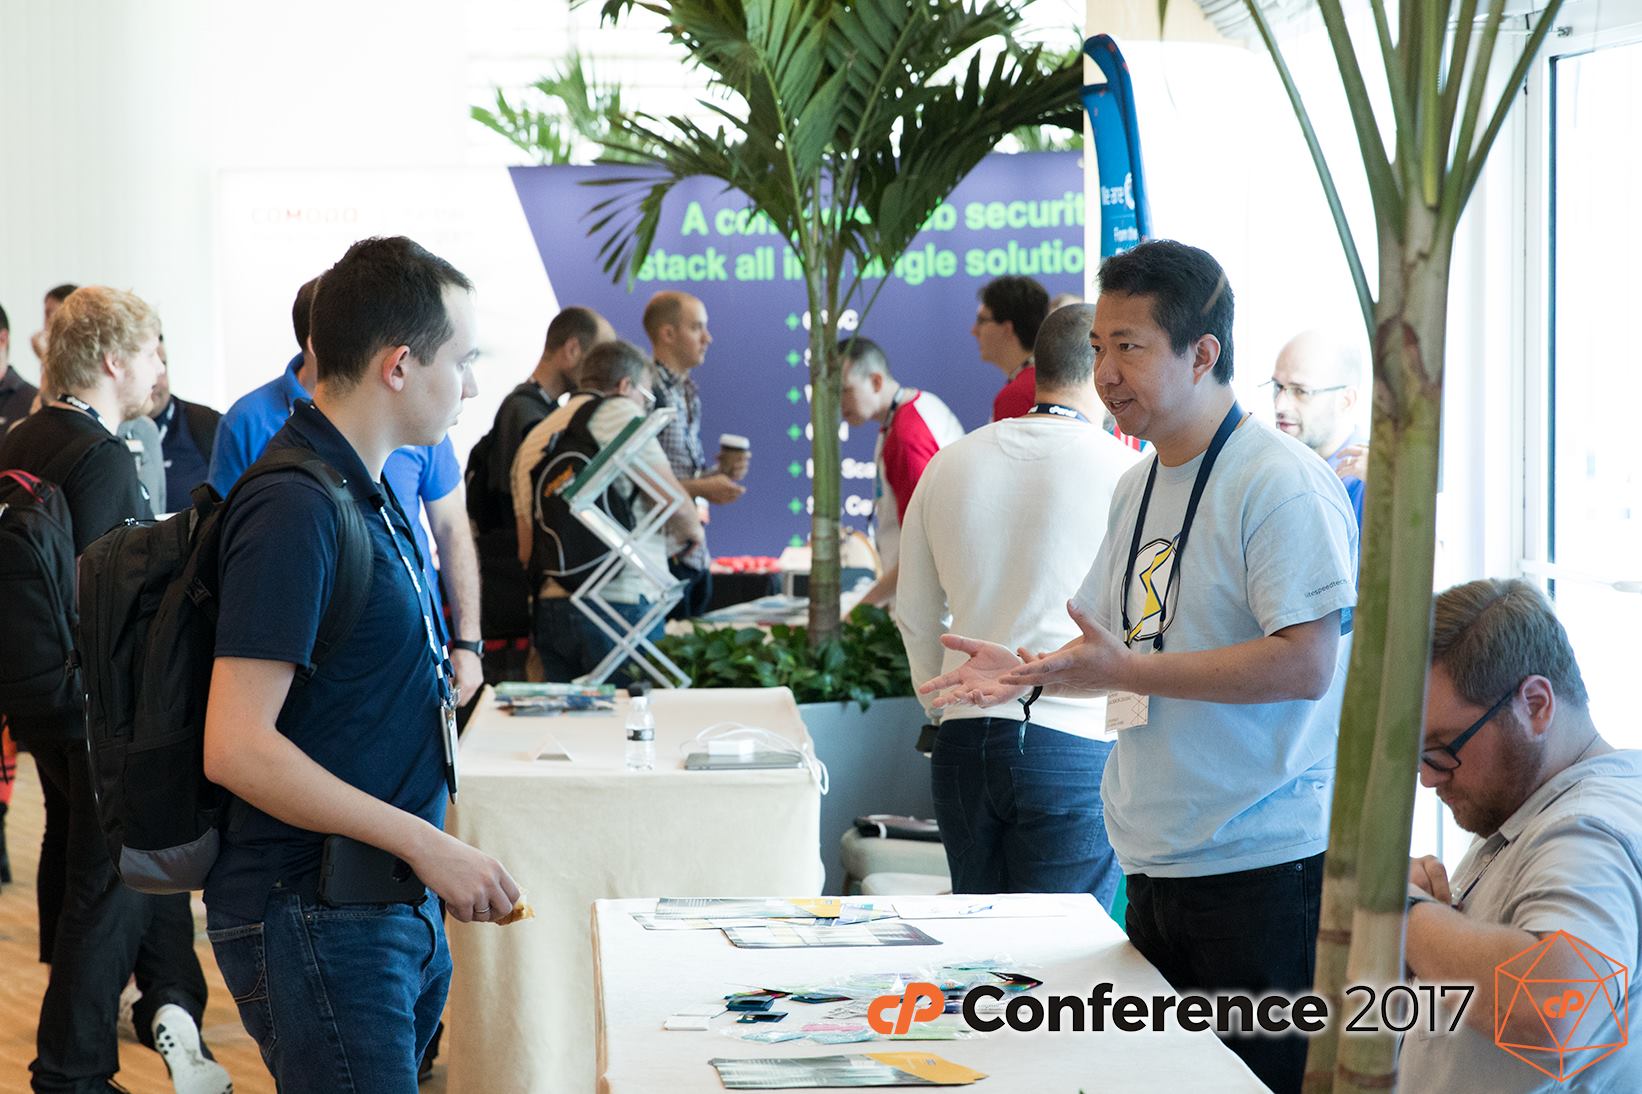
    This week some of our team hit the road and spent a few days in sunny Florida attending the cPanel Conference. If you were there, too, you probably saw our big blue display outside of Grand Ballroom 1, and hopefully you stopped to say hello to Jackson and Jonathan, too.

    Conferences like this are a great opportunity for us to meet up with old friends, existing clients, and those who have not yet experienced LiteSpeed. Sometimes this week our existing clients took the opportunity to chat with our potential clients and share what they love about LiteSpeed – how great is that?

    We enjoyed the chance to chat with our industry colleagues from all around the country, and some international friends as well. We had conversations with potential clients from Canada and Japan, and we played Cornhole with our friends at the table across the aisle.

    Jonathan gave a talk on Wednesday afternoon entitled “Are your servers QUIC?” If you weren’t able to be there, you can download a PDF of the presentation and see what you missed!

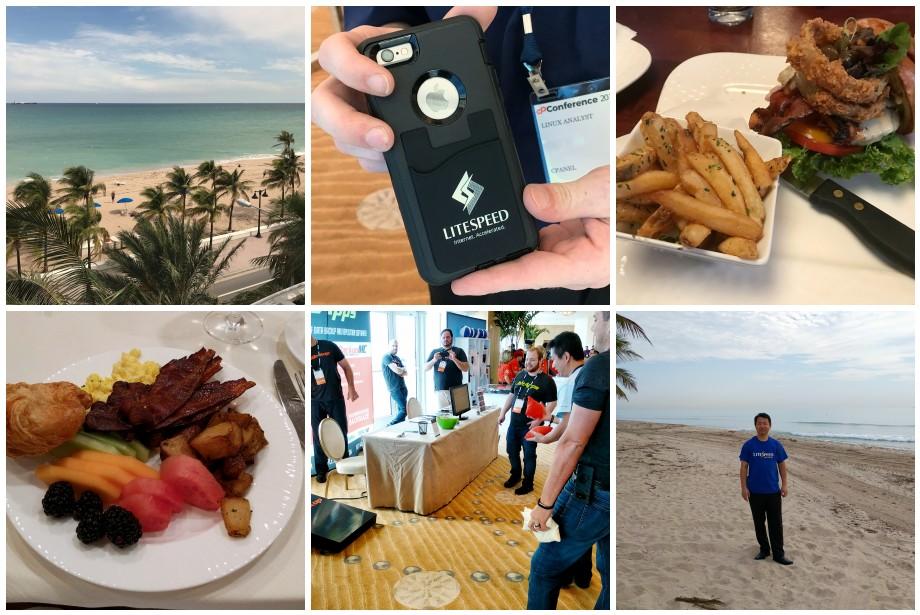
    This was cPanel’s 11th conference and their 20th Anniversary celebration. Harvey and Irma couldn’t keep this party from happening, though they certainly tried. All in all it was a great few days out of the office. We ate delicious hotel meals, attended a few festive parties, played games, attended talks, and most importantly we met up with old industry friends and made some new ones.

    We are already looking forward to the next conference!

    By the way, if you liked looking at our pictures, cPanel posted a bunch of their own on their Facebook page (which is where we grabbed that final image from – thanks, cPanel 🙂 ).

  • WpW: Autodiscovery, LSCache and the Command Line

    WpW: Autodiscovery, LSCache and the Command Line

    Welcome to another installment of WordPress Wednesday!

    Our topics in this series so far, have been mainly aimed at site owners, but today it’s your turn, hosting providers! Today we are going to talk about Autodiscovery through our command-line interface (CLI) script.

    What do I mean by this?

    Shared hosting providers love our WHM plugin’s web cache manager. It allows for autodiscovery of clients’ new WordPress installations and mass enabling of LiteSpeed Cache for all accounts. As more and more accounts are added, more and more hosts have requested to automate this via a CLI script.

    So, since LiteSpeed Web Server v 5.1.14, cPanel users who have the WHM plugin installed have had access to a nifty script that can be run from the command line. This script will automatically discover all of the WordPress installations on the server, and optionally enable LiteSpeed Cache for WordPress for each installation. It can be run by the cron as well, so that you can auto-discover and auto-enable on a schedule.

    Why would you want to do this?

    We’ve discussed before a few of the benefits to having your WordPress installation running our LSCache plugin. Now imagine you are providing hosting to dozens, hundreds, maybe even thousands of WordPress sites. Wouldn’t you want each of those sites to be using as few resources as possible, to keep everything running quickly and smoothly? Enabling LSCache on all of your clients’ sites allows you to host more sites on the same equipment you already own – no extra investment in hardware.

    As a busy hosting provider, you don’t have time to manually enable plugins on each and every site. That’s where the CLI comes in.

    With the CLI, you can auto-discover new WordPress installations and auto-enable the LSCache plugin, all without leaving the comfort of your simple command prompt. What a time saver! You can make it even less labor-intensive by hooking it into the cron. Every night at 3am, while you sleep, LiteSpeed Cache could be quietly enabled in all of the previous day’s new WordPress sites. Sweet dreams!

    How does it work?

    First, make sure you’re using cPanel and the WHM plugin.

    Then, locate the script at /usr/local/lsws/admin/misc/lscmctl, and you’re good to go.

    The CLI takes a command and a few possible parameters like so:

    ./lscmctl [-php path/to/php] command [flag/parameter]
    

    You can pass in the location of your preferred PHP binary, if necessary, via the -php flag, where path/to/php is, you guessed it, the path to your PHP executable.

    Let’s look at the commands you can use.

    Scan (Autodiscover)

    You can scan for all WordPress installations (and optionally enable the LSCache plugin) through the appropriately-named scan command.

    This command creates a lsc_manager_data file under the .../lsws/admin/lscdata directory, which contains information on all of the installations that are discovered.

    There are two options you can use with the scan command:

    • -n only discovers installations that are new since the last scan
    • -e enables the LSCache plugin on all discovered installations after scanning is complete

    Examples

    Discover all installations:

    ./lscmctl scan
    

    Discover new installations only:

    ./lscmctl scan -n
    

    Discover new installations and enable LSCache on them:

    ./lscmctl scan -n -e
    

    Notes

    When a site is discovered, the user’s home directory and the site’s document root are remembered. If a scan for new installations only (scan -n) is then run, it ignores this home directory/document root combination because it has already been discovered.

    This is usually not a problem, but there is one situation where it could be: Say a user, who already has one or more WP sites, installs a new one under an existing document root. That new site will not be found, because that home directory and document root were already previously discovered.

    For this reason, it’s recommended that you run a full scan once in a while, to catch these fringe cases that may have slipped through the cracks of a scan -n.

    Additionally, please keep in mind that autodiscovery only works two levels deep. So, it will find installations in path/doc-root, or path/doc-root/subdir, but not in path/doc-root/subdir/subdir.

    Enable

    The enable command is used to turn on the LSCache plugin on all discovered WordPress installations without running a new scan first.

    There is currently one option you can use with the enable command:

    • -m stands for “mass” and indicates that you want to enable to whole lot at once

    Example

    Enable LSCWP for all previously-discovered WordPress installations:

    ./lscmctl enable -m
    

    Notes

    When running the enable -m command, there are two situations where LSCache may fail to be enabled on a particular site:

    1. The site has opted out of LSCache. The WHM plugin provides the ability to “flag” a particular site so that it is skipped during a mass enable.
    2. The site has been auto-flagged to be skipped. This is usually caused by the detection of another cache plugin, but can sometimes also be triggered by an unspecified error with WordPress.

    Hands-Off Autodiscovery and Enabling

    Now that you know how all of this works, you’re probably thinking, “I don’t want to have to run this every single day by hand.” Well, you’re in luck. You can have the cron take care of the whole thing.

    Let’s say you want to do autodiscovery of new installations once-a-day, and you want to enable LSCWP for each of those newly-discovered installations.

    That’s a ./lscmctl scan -n -e command, which can be easily added to the cron.

    Enter crontab -e at the command-line prompt, and add the following line to the file:

    00 03 * * * /usr/local/lsws/admin/misc/lscmctl scan -n -e
    

    The 00 and 03 represent minute 00 and hour 03 (aka 3am). If you prefer a different time of day, you would change those numbers. If you’re unfamiliar with crontab syntax, you might want to take a look at this post, where we discussed it some detail.

    What if you’re not a cPanel user?

    It’s true that we have started with cPanel, but our goal is to make the CLI script available for users of all of our control panel plugins, including Plesk. So stay tuned, if this is you!

    So, hosting providers, what do you think?

    You can use the command-line interface to easily keep LiteSpeed Cache enabled on all of your clients’ WordPress sites, including brand new installations. Even better, you can hook this process into the cron so that the entire thing is nicely-automated.

    Be sure to leave a comment on this post, or contact us for support, if you have any questions about what the CLI script can do to speed up both your users’ sites and your own administrative tasks!

    [2019 update: there are additional commands beyond what are mentioned here. Please visit our wiki to learn what else you can do with the CLI script.]

    Have some of your own ideas for future WordPress Wednesday topics? Leave us a comment!

    Don’t forget to meet us back here next week for the next installment. In the meantime, here are a few other things you can do:

  • Benchmarks: LiteSpeed vs. Apache with cPanel + WordPress

    Benchmarks: LiteSpeed vs. Apache with cPanel + WordPress

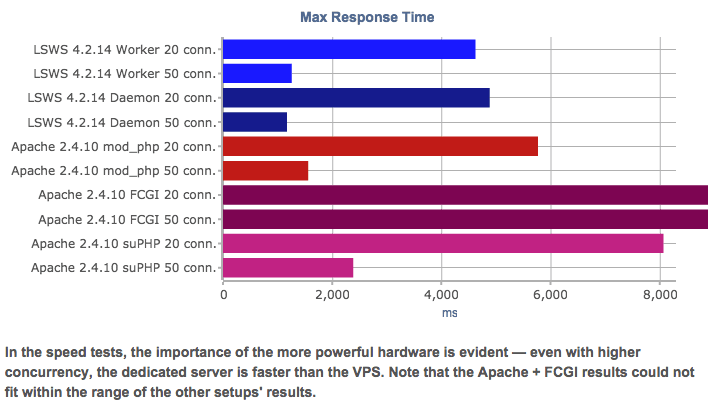
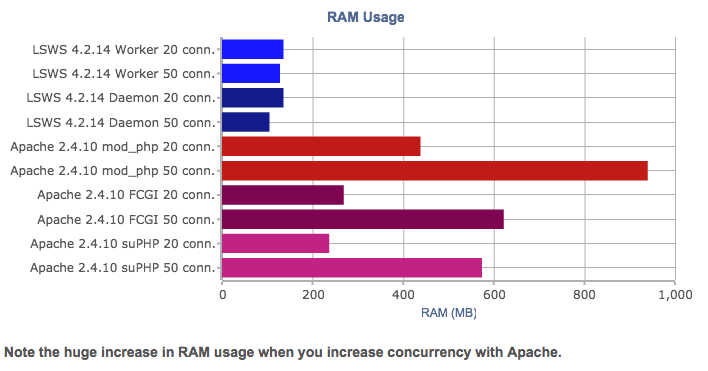
    cPBenchRAMThese benchmarks from cPanel Conference 2014 demonstrate RAM usage and server load differences for LiteSpeed Web Server vs. Apache. (more…)

  • Official cPanel Support for LiteSpeed Web Server!

    Official cPanel Support for LiteSpeed Web Server!

    cPanel supports LiteSpeed

    You requested it. We delivered. cPanel and LiteSpeed are announcing official support for LiteSpeed Web Server users through cPanel’s ticket system. (more…)

  • Auto-Installer: Automate LiteSpeed Installation for cPanel/WHM

    Auto-Installer: Automate LiteSpeed Installation for cPanel/WHM

    Our new auto-installer allows you to install LiteSpeed Web Server and our cPanel/WHM plugin with one script from the command line. This should make it much easier and convenient for hosts to deploy new LSWS/cPanel installations. (more…)

  • cPanel Support: The Official Position

    cPanel Support: The Official Position

    Update: cPanel now officially supports LiteSpeed Web Server!

    We have a lot of users using cPanel, and sometimes cPanel support for LSWS users can be something of a thorny issue. Some users have gotten the impression that cPanel will not support them just because they use LiteSpeed. cPanel and LiteSpeed want to assure you that this is not the case. I spoke with Brian Oates, cPanel’s Technical Support Manager, recently about how a support ticket should go: (more…)